No articles match your search. Try different keywords or contact support.
Getting Started
Installation
FLEDIT ships with a simple installer that does everything for you. Download it, run it, open Premiere Pro.
Download the installer - You'll receive the installer for your system: an .exe file on Windows, or a .pkg file on macOS.
Run it - Double-click the file you downloaded and follow the on-screen steps. The installer places FLEDIT where it needs to go automatically.
Open FLEDIT - Launch Premiere Pro and go to Window → Extensions → FLEDIT.
Close all Adobe apps firstThe installer can't run while Adobe software is open. If Premiere Pro - or any other Adobe app - is running, you'll get an “Adobe apps are running” message and the install stops. Close everything Adobe, then start the installer again.
Windows SmartScreen warningOn Windows you may see a red or blue warning screen titled “Windows protected your PC” when you start the installer. This is normal for a newly released app - click “More info”, then “Run anyway” to continue.
macOS Gatekeeper warningOn macOS the installer may be stopped with “… cannot be opened because Apple cannot check it for malicious software”. Right-click the .pkg file and choose Open, or go to System Settings → Privacy & Security and click Open Anyway. The installer then asks for your administrator password - that is normal, it needs it to place the components.
Uninstalling FLEDIT
To remove FLEDIT, use Add or remove programs on Windows, or open the FLEDIT Uninstaller from your Applications folder on macOS. As with installing, close all Adobe apps first.
During uninstall you can choose whether to keep your data - notes, timer history, macros, keyboard shortcuts, favorites and your user library. Keep it if you might reinstall later, or remove everything to completely wipe your data.
System Requirements
Requirement
Details
Host application
Adobe Premiere Pro 2025 (v25.0) or later
Operating system
Any Windows or macOS version that runs Premiere Pro 2025 or later
Additional
Internet connection needed to activate your license and for FLEDIT's periodic license re-checks - it works offline in between
I test and support FLEDIT on Premiere Pro 2025 and newer. It may well work on older releases, but I can't guarantee it - if you're on an earlier version and run into trouble, updating Premiere is the first thing to try.
License Activation
The first time you open FLEDIT you're asked to choose between the Free tier and a paid (Standard or Pro) license. Both flows live in the same Settings screen, so you can enter a key later too.
Activating the Free tier
You don't need a license key for Free. On the first-run dialog click Continue with Free plan - FLEDIT unlocks the free features immediately. You can always come back to Settings later and enter a paid key once you have bought one.
Choosing Free on the first run.
Activating a Standard or Pro license
After purchasing on Gumroad, you'll receive a license key via email.
Open the FLEDIT panel in Premiere Pro
Click the Settings icon (gear) in the top-right corner
Paste your license key
Click Activate
Pasting a Standard / Pro license key and activating.
Important details
Your license is tied to your machine's hardware ID. Standard = 1 machine, Pro = 2.
New computer, or hit your device limit? You don't have to deactivate anything by hand. When you try to activate on more machines than your license allows, FLEDIT opens a window listing every device currently using your key - with the date each one was activated and last used. Remove the device you no longer use to free up a slot, then continue. This works even if the old machine was formatted or is no longer accessible.
FLEDIT re-checks your license online from time to time, so it needs an internet connection now and then. You can keep working offline between checks, but if it can't reach the licence server for a while it will ask you to reconnect before you continue.
Updating FLEDIT
FLEDIT checks for a new version on its own and lets you download it straight from the panel - you do not have to go looking for anything on the website.
1The new-version notice
When a newer version turns up, a notice appears in the panel: “FLEDIT 0.8 available”, with the first line of the changelog and a Download button that opens the download in your browser. The notice shows once per panel session; dismiss it with Don’t show again and it will not come back for that version - but it will for the next one.
Everything that changed in each version, from new features to small fixes, is listed in the changelog.
2Settings → Updates & Notifications
Click the gear in the top-right corner of the panel and scroll to Updates & Notifications. It holds:
Version
The version you have installed right now - this is where you check it.
Latest
Appears only when something newer exists: the version number marked Update available, a Download Update button and the changelog under What’s new. When you are current, this row reads ✓ You’re up to date.
Notify me about FLEDIT updates
The checkbox that decides whether FLEDIT nudges you about a new version. Turning it off does not turn off service notices (a compatibility warning for a new Premiere release, for example) - those are always shown.
3Offers and promotions - the FREE plan only
In the same section, a user on the FREE plan gets a second checkbox: consent to receive commercial information about FLEDIT offers and promotions, shown as notifications inside the plug-in. The consent is voluntary and is not a condition of using the FREE version - without it you simply never see an offer. A status line under the checkbox says when consent was given or withdrawn. Unticking withdraws it immediately, and withdrawing it does not affect your newsletter consent from the website.
STANDARD and PRO get no offersOn the paid plans the checkbox is not shown at all, because promotional messages go to the FREE version only. Update notices and service notices work the same on every plan.
What the plug-in sends to fetch notificationsOnly its version, your plan and your operating system, plus whether offers are enabled. No identifier is sent, and your choice is stored on this computer only.
4Installing the new version
Download the installer - with Download in the notice or Download Update in Settings (you can always go to fledit.com instead)
Close Premiere Pro completely
Run the new installer - it replaces your existing version in place
Reopen Premiere Pro
Your licence and your data stay putAn update needs no re-activation and touches none of your notes, macros, shortcuts, library or timer history - they live outside the plug-in folder the installer replaces. From version 0.93 your panel settings also survive an update of Premiere Pro itself.
Split the panel into windows
When the FLEDIT panel is wide, you can have several tabs open at once (up to 4) - Notes next to Animations, say, or Timer under Zoom. There is no button or setting for it: you build the layout with a gesture.
1Opening a second window
Grab a tab on the top bar (Notes, for example) and drag it down, below the tab bar. A label with the tab's name follows the cursor and a lime drop zone appears on the panel - release the tab where the new window should go.
Dragging from the “•••” menu (tabs that didn't fit on the bar) works the same way. If you move the cursor back over the tab bar mid-gesture, the drag turns back into plain tab reordering.
Dragging a tab below the bar - the panel splits into two windows, Notes next to SearchBar.
2Working in several windows
The window you clicked last is active (lime border). Clicking a tab on the top bar replaces the content of the active window; clicking a tab that is already open in some window just moves focus there.
Drag the divider between windows to change the proportions; double-click it to go back to 50/50.
If you narrow the panel so the windows no longer fit, FLEDIT shows only the active window full-size; the layout waits and comes back once the panel is wider again.
3Closing windows
Hover over a window's top-right corner - ✕ (Close window) and a move handle appear (Move window - drag it onto the centre of another window to swap them). You can also right-click a tab on the bar → Close window, or drag the tab back onto the bar. When one window is left, the panel returns to the normal view.
Modules
Animations & Library
The Animations tab gives you a ready-made library of transitions, effects and animations. Double-click or drag onto the timeline. Mark favorites for quick access, and build your own library of custom MOGRTs and your own asset collection.
1Adding transitions and animations to the timeline
There are two ways to apply any built-in item:
Double-click - inserts the item at the current playhead position.
Drag & drop - drag the thumbnail onto the timeline. FLEDIT creates the necessary track, imports the template, and snaps it to where you release.
FLEDIT auto-detects your sequence resolution and rescales the template - a 1080p transition works on 4K and other 16:9 formats. Items marked with a 16:9 badge are designed for that aspect ratio and may not scale correctly to vertical (9:16), square (1:1), or other non-16:9 formats.
Both methods in one clip - double-clicking a thumbnail to insert at the playhead, then dragging another transition straight onto the timeline.
Audio toggle The speaker icon in the top toolbar (only active in built-in folders) controls whether transitions are imported with their bundled audio track. Turn it off if you want a video-only version.
2Length of built-in MOGRTs - the Selected MOGRT bar
FLEDIT's built-in MOGRTs have an intro and an outro baked in. If you shorten such a clip by trimming it on the timeline, the outro stays where it was (at second 10, say) - you simply cut it off. So change the length in the plugin instead:
Select one or more built-in FLEDIT MOGRTs on the timeline. A SELECTED MOGRT bar appears under the preview area of the Animations tab, with the number of selected clips and a time field (HH:MM:SS).
Drag the field left or right to shorten or lengthen (Shift = faster, Ctrl / Cmd = fine), or click it and type a time: “120” is 120 seconds, “1:30” is a minute and a half. The left / right arrow keys step one frame, a second with Shift, 10 seconds with Ctrl / Cmd. Enter confirms, Esc cancels.
FLEDIT changes the clip length and moves the template's disappear moment, so the outro always ends exactly at the end of the clip. The intro stays as it was. With several clips selected, they all get the same length.
Built-in MOGRTs onlyThe bar appears only for FLEDIT's built-in MOGRTs. MOGRTs from your User Library and other clips don't have it.
The SELECTED MOGRT bar - dragging the time field changes the clip length, and the outro re-fits to its end.
3Templates with a replaceable background - 3D Camera and Liquid Glass
In the Animations → 3D Camera and Animations → Liquid Glass folders there is a How to use button above the tile grid. It opens the “How to change the background” guide with a video.
These templates have a replaceable background. You can put any photo or video inside.
Drag the template to your timeline, then click the clip once to select it.
Open the Properties panel (Window → Properties). In older Premiere versions open Essential Graphics (Window → Essential Graphics → Edit).
Find the Background group (it comes from this template) and click the menu button on its right side. In the dropdown choose Replace from Explorer, then pick the photo or video you want.
Want to use a piece of your timeline as the background?
In the timeline, select the clips you want to use. Pick about the same length as the template (for example 30 seconds).
Right click the selection and nest it.
Open the Project panel and find the nest you just created.
In the Background group, click the arrow to expand it so the preview becomes larger.
Drag the nest from the Project panel onto the large preview in Background Replace. Your nested video now plays as the background.
The same steps recorded in Premiere - replacing the background via Properties and dragging a nest onto the preview.
4Favorites - quick access to what you use most
Click the heart icon on any thumbnail to add it to Favorites. Favorites work for everything - built-in transitions, built-in effects, your own MOGRTs, your imported media. The Favorites folder appears at the top of the sidebar so you never have to dig through categories again.
Marking animations and MOGRTs as favourites and opening the Favorites folder.
5User Library - create your own folders
Click + New Folder in the sidebar to create a folder for any kind of content - client logos, intros, sound effects, music, anything you reach for often.
You can rename the folders you create (right-click → Rename), change their display order, and delete them at any time.
Library size on the Free planOn the Free plan the User Library holds up to 300 files - media files and MOGRTs counted together. The counter in the User Library bar shows how many you've used (e.g. Library 120/300). A media folder that doesn't fit is skipped as a whole, and from a batch of MOGRTs only as many go in as there's room for. Nothing already in the library is removed, but files over the limit (e.g. when a watched folder grew on disk, or after your plan changed to Free) are greyed out with a LIMIT badge and can't be used until you free up space. STANDARD and PRO have no limit.
Creating a new folder in the User Library.
6Search - in a folder or everywhere
When a User Library folder is open, the search field looks only in that folder and its subfolders. The field says so: “Search in <folder>...”. While you type, a Search in: switch appears above the results with two halves: the folder name and Everywhere, meaning all your folders and the built-in presets. Each shows its number of results. When the folder has nothing but other places do, click Search everywhere. Clearing the field takes you back to the folder you started from.
You can type several words in any order, and upper or lower case and accents don't matter: “caly” finds “CAŁY”.
7Importing your own MOGRTs
Click + Import → MOGRT, pick a .mogrt file (or drop one onto the import dialog), choose a target folder and confirm. The MOGRT is copied into your User Library and behaves exactly like a built-in item - double-click or drag onto the timeline.
Importing a MOGRT into a custom folder and dragging it to the timeline.
8Importing media folders - live folder watching
Click + Import → Media and pick a folder on disk, or drop several folders into the window at once. In Target folder, choose where they go:
USER LIBRARY (the first item on the list) - each folder becomes a separate library folder, named as on disk, together with its subfolders.
One of your folders - the imported folder goes inside it.
By default the folder you're currently in is selected, or USER LIBRARY if you're not in any. This option exists only for media imports: MOGRTs and sequences always go into a library folder (if you don't have one yet, FLEDIT creates “My Library” for you).
Files and subfolders stay in sync with what's actually on disk. There's nothing to refresh by hand: FLEDIT re-reads the folder whenever you switch back to the panel, so changes you make in Explorer or Finder show up on their own within a few seconds. If a change ever doesn't appear, click anywhere in the FLEDIT panel to give it focus - the list refreshes the moment it does.
Supported formats:
Video: .mp4 .mov .m4v
Audio: .mp3 .wav .aac .m4a
Image: .jpg .jpeg .png .gif
Any other file type in the folder is simply ignored.
How live syncing works:
File added
Drop a new file into a watched folder - it shows up in FLEDIT on its own the next time the panel has focus (usually within a few seconds). No manual refresh needed.
File deleted
Delete a file on disk and its card disappears from FLEDIT - the small cache it created is cleaned up along with it.
Subfolder added or removed
Create a new subfolder inside a watched folder in Explorer/Finder and it appears in the list; delete a subfolder and it drops out. The library always mirrors your folder structure on disk.
Renamed externally
Rename a file in Finder/Explorer and FLEDIT treats it as the old one leaving and a new one arriving. Note: if you used that file in a macro, the macro will show a “BROKEN” status - you can then point the macro at the new file, as described in the macros section.
Right-clicking a media card gives you two options:
Show in Explorer / Reveal in Finder
Jumps straight to the file in your system file manager - Explorer on Windows, Finder on macOS - so you can locate it on disk in one click.
Delete
Hides the card from FLEDIT only. The file stays exactly where it is on disk - nothing is removed from your folder, you're just tidying up what shows in the library. To get rid of a file for good, delete it on disk and FLEDIT will drop the card on its own.
Adding a media folder to the User Library.
9Importing sequences from other projects
You can pull whole sequences out of another Premiere project and keep them in your User Library. Click + Import → Sequences and pick a .prproj file; FLEDIT reads it and lists the sequences inside, so you choose which ones to add to a library folder.
To import a sequence into an open project, just double-click it.
Good to knowVery large project files are skipped (anything over ~500 MB). If a .prproj can't be read, or has no sequences inside, FLEDIT tells you.
Importing sequences from a .prproj into the User Library.
10Built-in player & “ON TIMELINE” indicator
Click any media to open the built-in player - a video player for clips, an image viewer for stills, or a waveform for audio files.
Trim before you add - in & out points. You don't have to drop the whole file on the timeline. Mark a range in the player and FLEDIT inserts only that fragment of the clip or track:
Space - play / pause
I - set the in point at the current position
O - set the out point
Esc - clear the in / out selection
You can also do it with the mouse: right-click the waveform or playback bar and pick Mark In, Mark Out or Clear In & Out. Once a range is set, double-click the card or drag it onto the timeline - only the selected portion is added.
Once a piece of media is on your timeline, FLEDIT marks the corresponding library card with a small green dot and a status (“ON TIMELINE”). Remove the clip and the “ON TIMELINE” status disappears, so you always know what's already in use. The Refresh and Auto buttons handle refreshing the media status on the timeline:
Auto
Auto-scan. FLEDIT watches the timeline and keeps the “ON TIMELINE” badges up to date automatically as you edit. The refresh runs on a cycle, so a change can show up with a slight delay. If you need the current state right away, click into the FLEDIT panel so it takes focus - it refreshes immediately then. Auto can be demanding on a heavy timeline - turn it off then and refresh by hand instead.
Refresh
Scans the timeline and updates the “ON TIMELINE” badges - the quick way to see what's currently in use when Auto-scan is off.
Importing user media to the timeline - the “ON TIMELINE” indicator appears.
Removing the clip from the timeline - the indicator disappears.
11View modes & card size
Toggle between grid view (default) and list view from the toolbar. The slider next to it controls thumbnail size in grid mode, or row height in list mode.
12Errors & warnings - what they mean
When an import or a drop can't go through, FLEDIT shows a short message (usually a toast that fades out). Here's what the common ones mean.
Message
What it means
Adding to the timeline (drag & drop)
“No active sequence”
Open or create a sequence before adding anything.
“Wrong track type”
A MOGRT or a video file needs a video track, an audio file needs an audio track. Drop it onto a matching track.
“Target track is locked”
The track you aimed at is locked; unlock it and try again.
“Sequence has no audio tracks”
The MOGRT includes audio but your sequence has nowhere to put it. Add an audio track first.
“Dropped outside the timeline” / “Drop didn't reach the timeline” / “Premiere refused this drop”
The item landed in the Source Monitor or Project panel, or on a wrong / hidden / locked track. Aim for a track in the timeline.
“Premiere was busy”
The drop wasn't processed because Premiere's main thread was occupied (rendering, indexing, another script). Nothing was added - try again in a moment.
“Some files couldn't be imported”
Part of a multi-file drag failed. Usual causes: an unsupported codec, special characters in the filename, or a duplicate already in the bin.
Importing your own MOGRTs
“MOGRT file is corrupted”
The MOGRT file couldn't be read - the file may be damaged.
“MOGRT requires a newer Premiere”
Update Premiere to use this MOGRT.
“This MOGRT needs After Effects” / “After Effects version mismatch”
The template renders through After Effects, which isn't installed (or is the wrong version).
“MOGRT placed, but some assets are missing”
The template was inserted, but footage it links to couldn't be found, so some layers show as offline.
“No .mogrt files found”
You dropped something that isn't a MOGRT. Import → MOGRT only accepts .mogrt files.
“Import in progress”
Wait for the current MOGRT import to finish before starting another.
Importing media folders
“… loose file skipped - drop folders only”
Media import takes whole folders, not single files. Drop a folder.
“… already added or already in your library”
That folder is already linked to your library.
“… could not be read”
The folder is missing or inaccessible (permissions, or a drive that's been unmounted).
Importing sequences
“No .prproj files found”
You picked or dropped something that isn't a Premiere project file.
“Failed to parse … or no sequences found”
The .prproj couldn't be read, or has no sequences inside - it may be corrupted or from an unsupported Premiere version.
“… too large to import safely. Skipped”
The project file is over ~500 MB, so it's skipped.
“Wait for the current sequence import to finish”
A sequence import is already running. Let it complete first.
“Target folder was removed during import”
The destination library folder was deleted mid-import, so the remaining items were skipped.
User Library - limits & files
“User Library is limited to 100 folders”
Delete an unused folder before creating a new one.
“Cannot import - your User Library is full.” (Free Plan Limit window)
Your library on the Free plan already holds 300 files. Free up space or upgrade to STANDARD or PRO.
“… skipped (Free plan limit)”
That part of the import didn't fit within the limit: a media folder is skipped as a whole, and only as many MOGRTs went in as there was room for. The rest went through normally.
“File not found”
A file is no longer on disk; the folder may have moved or the drive been unmounted.
“Failed to write userLibrary.json”
FLEDIT couldn't save your library to disk. Your changes are kept for now but may be lost when Premiere restarts - check free disk space, file permissions, and antivirus.
Player
“Preview not available”
The file type isn't supported by the built-in preview, or the clip couldn't be decoded. The preview handles .mp4 .mov .m4v, .mp3 .wav .aac .m4a and .jpg .jpeg .png .gif.
Premiere is loading or stuck, or its scripting layer is unreachable. Wait a moment; if it persists, restart Premiere.
Text Animate
Text Animate - built for captions in short-form vertical video - Reels, TikTok and Shorts. Pick any animation, then double-click a tile - the animation lands on every selected clip.
Not just for textThese animations were made for captions, but you can use them on any clip just as well - graphics, MOGRTs, photos, video clips.
1How it works - set once, then click
Select one or more clips on the timeline.
Set the options in the settings card - Mode, Speed, Ease, Slide distance, Motion blur.
Double-click a tile. The animation is applied to every selected clip at once.
A tour of the tab - the settings card (Mode, Speed, Ease, Slide distance, Motion blur), the tile sections, Loops and the settings.
2The settings card
Mode
In, Out or In + Out. Decides whether the animation plays at the start of the clip, at the end, or both. Only affects the In & Out section - Loops ignore it.
Speed
Quick and Slow are the two built-in timings. Custom unlocks the Duration slider, where you set the length of the entrance / exit yourself.
Ease IN / OUT
A separate curve for the entrance and the exit. Auto (per animation) uses the curve built into the preset. You can also pick any curve from Ease Keyframes - built-in or saved by you.
Slide distance
How far the captions move.
Motion blur
Turns on the Shutter Angle of the Transform effect so fast moves smear like real camera motion. The number next to it is the angle, 0-360; 180 is the natural, camera-like value.
Every preset carries a curve that suits it - which is why Auto is the safe choice. Swapping in your own curve always works, but not every curve looks good on every animation: a strong overshoot (Overshoot, Elastic, Bounce) gives a short entrance a kick, while on a loop or a long, slow move it can read as a jolt. If the result surprises you, go back to Auto or to a gentle curve.
Mode shortcutsWhile the Text Animate tab is open, Ctrl+1 / Ctrl+2 / Ctrl+3 (Cmd on macOS) switch Mode to In / Out / In + Out. Change the combinations in Settings → General → Keyboard shortcuts.
3In & Out - entrances and exits
These play at the edges of the clip and follow the Mode setting. They're grouped into families:
Family
Tiles
What it does
Slide
Up, Down, Left, Right + 4 diagonals
The caption slides in from off-screen. The diagonal tiles are named after the direction of travel - Down-Right enters from the top-left corner.
Effects
Scale, Bounce, Blur, Strobe, Shake
Scale pop, a bouncy pop, a blur-in, a rapid blink at the start / end, and a shake.
Tilt
Up, Down, Left, Right
Rises into place with a straightening tilt.
Windy
Up, Down, Left, Right
Floats in with a sideways wind drift.
Knock
Up, Down, Left, Right
Shoots past the target and gently settles back.
Clips that start together stay togetherIf several captions start (or end) at exactly the same time, FLEDIT gives them the same entrance length so the group moves as one, instead of each caption running its own timing.
Boards that are too shortAnimation length is strict - FLEDIT doesn't compress the motion into a short clip (unless you turn on Fit speed to clip in Settings). If a board of several captions ending together is too short for entrance + hold + exit, the exit is dropped entirely for the whole board and the entrance stays full - better for the group to behave consistently than for each caption to cut off at a different point.
Pass the direction on - that's what makes it look professional. The eye keeps following the last direction it saw, so a caption should enter the way the previous one left. If caption 1 exits with Slide Left, caption 2 enters with Slide Left. Caption 2 is then free to exit in a new direction - Slide Up, for example - and caption 3 picks that up and enters with Slide Up. Change direction as often as you like; just always hand the direction over. This is what keeps a fast caption sequence reading as one continuous move instead of a pile of separate effects.
Caption
In
Out
1
anything
Slide Left
2
Slide Left
Slide Up
3
Slide Up
Slide Right
Several captions on screen at once. When two or three independent captions share the screen, the rule applies to the group, not to every single caption. The first caption of the group still enters with the direction the previous caption left on. The ones that join it afterwards can enter however you want - they build up as a block. But when the block leaves, every caption in it exits with the same animation, and the next caption enters with that one. The handover happens between groups, not inside them.
4Loops - motion that runs the whole clip
Loops ignore Mode and play across the entire clip. They have their own controls under the section header:
Speed
How fast the loop plays.
Range
How far the motion travels.
Motion blur
The same switch as in the settings card - motion blur applies to loops too.
Loop
What it does
Blink
Organic flicker. Speed sets the tempo, from lazy blinks at 0.1x to a nervous strobe at 2x. Range has no effect here - opacity is either on or off.
Stay Blur
The caption quickly becomes blurred and stays blurred.
Pulse
Scale pulsing, like a heartbeat.
Wiggle
Classic smooth position wiggle - no rotation.
Wobble
Position plus a strong tilt - the signature lively wobble.
Scribble
Hand-drawn boil - the caption redraws a few times per second.
Drift
Wide slow float - the caption drifts far around the frame.
Handheld
Fast, nervous handheld-camera shake - tight and subtle.
Jitter
Hard high-frequency buzz - position only, no rotation.
Sway
Pure pendulum rotation - no position change.
Difference
Sets the clip's Blend Mode to Difference.
One loop for the whole caption trackIf you want every caption to carry the same loop - a Wiggle running under the entire video, for example - don't apply it caption by caption. Select them all, run Nest Clips from the SearchBar, and drop the loop on the nest instead. One clip, one animation, and the motion runs continuously across all the captions inside.
Apply Wobble to a lower-third caption and the pivot detection does the rest: the text swings around itself, not around the frame. Scale, Bounce, Tilt, Windy and the loops that rotate or scale work the same way: FLEDIT measures the center of every caption separately, also when you animate several captions at once, when a caption sits off-center or when its Anchor Point has been moved.
5Stacking - every animation gets its own Transform
The In, the Out and each loop are written to a separate, fresh Transform effect. That means you can stack them freely: a Slide In, a Knock Out and a Wobble loop can live on the same caption, and you can remove any one of them in Effect Controls without disturbing the others. There's no limit to how many you stack.
6Favorites & the Random button
Click the heart on any tile to mark it as a favorite, then use the All Presets / Favorites switch to show only the ones you actually use.
Random assigns an animation to every selected caption in one click. The Settings button opens the settings page with three tabs: Profiles, Random and General.
Random
Random picks from
Types draws from the families you switch on: Slide, Scale, Bounce, Blur, Strobe (off by default), Tilt, Windy, Knock, Shake. Diagonal slides adds corner entries to Slide. Tiles draws only from the tiles you pick.
Add a loop
Adds a loop on top of the entrance and exit. Loops to use: Any, or Pick for chosen loops only.
Chain captions
Each caption enters the way the previous one exited, so a run of captions reads as one move. Works in In + Out mode.
General
Fit speed to clip
Off by default: animation length is strict, so on a very short caption the cut may interrupt the motion mid-flight. Turn it on to let FLEDIT speed the motion up so it fits a short clip.
Loop tile previews
Tile previews play in a loop instead of only on hover.
Keyboard shortcuts
The shortcuts that switch Mode (In / Out / In + Out) - see above.
Random over a whole run of captions - one click deals an animation to every selected clip.
7Profiles - separate settings for every client
The Profiles tab in Settings keeps sets of settings, for example one per client or per format. Text Animate and Positioning always use the selected profile, and every change saves to it automatically. On first start your current settings become the Default profile.
New… - a new profile with FLEDIT's original settings and no Favorites.
Duplicate… - a copy of the selected profile.
Rename… and Delete… - a deletion can't be undone, and the last profile can't be deleted.
Click a profile in the list to switch to it. A profile remembers the motion settings, Random, Favorites and the Positioning Basics card. Mode with its shortcuts and the tile order and previews in All Presets stay shared by all profiles.
8Reorder - your own tile order
The Reorder button in the view row turns on rearranging mode: grab a tile and drag it to another spot within its category.
9Undo
The Undo button at the top of the tab reverts the last Text Animate action: it removes the keyframes and the Transform effects FLEDIT added. A Transform you changed after the animation stays on the clip, and FLEDIT tells you so.
Premiere's Ctrl+Z (Cmd+Z) usually undoes the whole action in one press too, but with many clips the Undo button is the safer choice.
10Positioning - automatic caption layout
Raw word-by-word captions (one word = one clip, the way a transcript produces them) are arranged by Positioning into designed boards: it groups words into lines, picks a shape, shrinks the supporting lines and spreads the clips across tracks so that every word comes in at its moment in the speech. The Positioning button in the view row opens this feature.
What you need
Captions as Premiere text graphics. One word per clip works best; two work, three is the maximum - a caption can't be split, so clips with 4+ words are left untouched, and if all of them are like that the tool refuses and asks you to re-transcribe with fewer words per caption. Make the captions in Transcribe (set Max to 1-3) and turn them into graphics with the Upgrade Caption to Graphic command in SearchBar.
Range: Selection (the clips you selected) or In & Out (everything between the sequence In and Out points).
Preview vs Arrange captions
Preview builds the plan and shows a strip of thumbnails. Click a word to select it, and double-click a thumbnail to see the board big. Nothing on the timeline changes. After the first measurement every settings change re-plans the preview immediately, and you can also fix boards by hand (see below).
Arrange captions lays the captions out on the timeline, but first asks where. Copy of the sequence creates a new sequence “… - arranged” with the finished layout and leaves the original as it is. This sequence arranges the captions right here, and the Positioning Undo button puts them back.
The Basics card - everything the tool asks of you; the rest is measured from your material.
Words on screen
Auto / 2 / 3 / 4 / 6 / 8 - how many words make one board. Auto picks one of these numbers from the pace of speech.
Lines at most
1 / 2 / 3 - the most lines one board may spread over. It is a cap, not a fixed count: a line is filled with words first and broken only once the next ones stop fitting, so short boards still stay on a single line.
Max letters per line
The longest a line may get (60 = no limit). A caption longer than the limit stands alone on its own line.
Line width
Narrow / Wide / Custom - how wide a line made of several words may grow, counted as a share of the frame width. Narrow and Wide work that share out from the size of your own captions (two or three words to a line) and show it on the Share of frame slider below; Custom unlocks the slider so you set the percentage yourself.
Height on screen
Where the top line sits, measured from the top of the frame; extra lines grow downwards.
Auto line spacing / Line spacing
The gap between lines, measured letter to letter and scaled with the text size, so lines always stay close to the caption. Turn Auto off to set it yourself (e.g. when a small top line above a big one looks too far away).
What appears at once
Whole line - captions come in line by line: the middle one first, then the top, then the bottom. By words - every word appears on its own, the moment it is spoken. Whole block - the whole block of text at once.
Word-by-word captions
0-100 % - what share of captions stays in “one word on screen” mode.
Line sizes
Off / Subtle / Smaller / Custom - the size of the lines around the main (middle) one. The main line never changes size; Line sizes affects the captions above and below the middle one.
Layouts
Choose layouts - which board shapes the tool may pick. Turn off the ones you don't want. The same shape never comes twice in a row, one-line boards are always centred, and three-line shapes only appear when Lines at most is set to 3.
Arrange captions your way - the automatic layout is a starting point. In the preview strip, after you click Preview, you can fix every board by hand.
Move words
Click a word to select it. Ctrl/Cmd or Shift + click selects the words from the first one you clicked up to this one, within one board. Drag the selection: on a neighboring board you choose Same line, New line or Auto, within the same board Line above, Line below or Own line, and between boards New caption, a caption of its own. The order of speech never changes, so only the first words can move to the board on the left and only the last words to the board on the right.
Join two boards
Grab a board by its background and drop it on its neighbor.
Split and Auto
A board you changed by hand shows a Split or Auto button in its top-left corner. Split breaks it where you joined it, or into separate captions, one per line. Auto hands those words back to FLEDIT.
Layout
Hover over a board and click Layout in its top-right corner. You choose the number of lines (1, 2 or 3) and the alignment, e.g. Left stack, Centred or Staircase. The choice applies to that board only, and Auto leaves the decision to FLEDIT.
Places the words won't fit turn gray and tell you why, e.g. “Too many lines” or “Line too wide”. Ctrl+Z and Ctrl+Shift+Z (Cmd on macOS) undo and redo your manual edits and settings changes.
Your edits are saved separately for each sequence, and Arrange captions uses them. If a settings change means a hand-made board no longer fits, FLEDIT arranges those words itself, and your version comes back once the settings allow it again.
Above the preview you pick the thumbnail size S / M / L, and the Animation checkbox plays the captions coming in after every change and when you hover a thumbnail.
Refusals and warnings - what they mean
Message
What it means
“No captions selected”
Select the caption clips, or switch Range to In & Out and set In / Out around them.
“No sequence open” / “No In and Out points on this sequence”
Open the sequence; in In & Out mode set the In and Out points.
“Nothing here looks like a caption”
The selected clips are not text graphics.
“These captions are already arranged”
Captions on two tracks overlap in time - click Undo or pick a stretch you haven't arranged yet.
“These captions are too long to arrange”
Each clip holds about 4+ words and a caption can't be split - re-transcribe (3 words per caption at most, 1 works best).
“N caption(s) hold(s) 4+ words - left untouched”
Those clips were skipped, the rest was arranged.
“N selected clip(s) is/are not caption(s) - ignored”
Non-text clips in the selection are ignored.
“group N: the block is X px tall and does not fit on screen”
Lower Lines at most or the size.
“Words on screen: N group(s) hold(s) more words than the limit”
Single captions hold more words than the limit - raise the limit or re-transcribe with fewer words.
“could not free video tracks…” / “target track is occupied”
FLEDIT couldn't safely make room on the tracks - nothing was overwritten.
Also skipped: clips without Vector Motion, with rotation (on Vector Motion, Motion or Transform), with skew (Transform skew), and clips that render empty.
Positioning - the Basics card, the board preview and the finished caption layout on the timeline.
Transcribe
Transcribe turns the speech in a sequence into captions. Pick the tracks with speech and the language, and FLEDIT lays the finished captions on a new caption track in the same sequence. Speech recognition runs on your computer: the recording is never uploaded and no internet connection is needed for it. FLEDIT only goes online now and then to check your license, as it does in the rest of the plug-in. Available on the PRO plan.
1Making captions
Listen to - choose the tracks with speech: ALL or specific ones, e.g. A1. Leave music and effects out and the captions come out cleaner.
Range - In - Out (default) makes captions only between the In and Out points, Whole sequence for the entire sequence.
Spoken language - pick the language spoken in the video. FLEDIT usually catches English phrases along the way too.
Click TRANSCRIBE. The progress bar shows how much is left, and while the speech is being recognized you can stop with CANCEL.
When it's done you'll see “Transcription ready” with the number of captions, and a new caption track appears on the sequence. The FLEDIT Transcribe bin also holds an .srt file with the same captions.
2Caption settings
Words per line
Min and Max - how many words one caption line may hold (1 to 6 by default). If the captions are headed for Positioning, set Max to 1, at most 3.
Punctuation
Keeps commas, periods and question marks. On by default.
Fill gaps
Each caption stays on screen until the next one starts, with no blank moments in between. Off by default.
Censor profanity
Masks swear words in the caption text, e.g. f**k. Works in 46 languages, the same ones as Auto Censor. Off by default. Level: Low hides strong swear words, Hard also milder words and insults.
Your words
Edit words… opens your list: words to always hide and words to never hide. The list is shared with Auto Censor.
Transcribe makes a regular Premiere caption track. To animate the captions in Text Animate or arrange them in Positioning, first turn them into graphics with the Upgrade Caption to Graphic command in SearchBar.
5How long it takes
It depends on your computer, above all on the graphics card. FLEDIT picks the fastest route by itself: the graphics card, or the processor when that isn't possible. The first transcription on a given Mac takes a dozen or so seconds longer.
6Messages - what they mean
Message
What it means
“Set the In and Out points first, or choose Whole sequence.”
Range is set to In - Out, but the sequence has no In and Out points. Set them or choose Whole sequence.
“No audio clips between the In and Out points on the selected tracks.” / “No audio clips on the selected tracks.”
The chosen tracks have no audio clip in that range. Check Listen to and the In / Out points.
“No speech was recognized in the selected audio.”
The chosen audio has no speech, or music drowns it out. Pick a track with just the voice.
“Not enough free disk space on …”
While it works, FLEDIT writes a temporary audio file. Free up space on your system drive.
“Audio export preset not found in this Premiere installation.”
Premiere is missing the audio export preset FLEDIT needs. Write to us at support@fledit.com.
“Transcribe needs an active PRO license on this computer.”
Your license isn't PRO, or FLEDIT couldn't confirm it because the computer was offline for too long. Connect to the internet and try again.
Cut Silence
Cut Silence cuts silence and pauses between words out of a recording. FLEDIT measures how loud the sound is and keeps a margin so the quiet ends of words don't get clipped. You can listen to the result before cutting, and by default everything happens on a copy of the sequence. It runs on your computer without uploading the recording. Available on the PRO plan.
1Cutting the silence
Listen to - the tracks that decide where the silence is, usually the voice track. The cuts themselves go through every track, so picture and sound stay in sync.
Range - In - Out (default) or Whole sequence.
Pick a preset and click ANALYZE AUDIO.
Listen to the result in the Loudness preview: Space plays the recording the way it will sound after the cut.
Click CUT SILENCE.
2Presets
Preset
What it cuts
Long pauses only
Only long pauses, from about 1 s. Talks and interviews where the pace should stay natural.
Balanced
Pauses from about 0.6 s. A good starting point.
Tight
Pauses from about 0.4 s. A quicker pace. The default preset.
Jump cut
Even short breaks, from about 0.25 s. A punchy style with a cut every moment.
Save your own settings as a preset: Save as…, Rename…, Delete….
3Fine-tuning
Silence threshold
Below what loudness sound counts as silence. Auto (default) sets the threshold from the loudness of your voice.
Minimum silence
The shortest pause FLEDIT cuts. Shorter ones stay.
Keep after speech
How much silence to keep after a word before the cut starts.
Keep before speech
How much silence to keep before the next word.
Ignore short sounds
Sounds shorter than this value, like a tap or a keyboard click, don't break the pause. Anything as loud as speech is always kept.
Threshold line on the preview
Shows the silence threshold as a line on the preview.
Changing a setting recalculates the cuts straight away. Ctrl-drag (Cmd on macOS) on a slider gives finer steps.
4Fixing cuts by hand - Edit cuts
After the analysis click Edit cuts. Clicking a cut keeps that one pause in the video, and a second click cuts it again. Dragging the left edge of a cut changes Keep after speech, the right edge changes Keep before speech - always for every cut at once.
When you change something on the timeline or in the tracks, click Analyze again. FLEDIT asks first, because a new analysis replaces the preview and your cut edits.
5Action and Apply to
Remove silences
Cuts the silence and closes the gaps. The default.
Remove silences, leave gaps
Cuts the silence but leaves empty space on the timeline.
Mute silences
Cuts nothing: it splits the clips on the Listen to tracks at the edges of the pauses and disables the pause pieces. Picture and length stay the same, and you'll see the splits on the timeline.
Keep silences, remove the rest
The other way round: keeps only the pauses and cuts everything else.
The button follows your choice: CUT SILENCE, MUTE SILENCE or KEEP SILENCE.
Apply to: New sequence (default) makes a copy named “… - cut” or “… - muted” and leaves the original untouched. This sequence cuts this sequence straight away, after you confirm.
Work on a copyOn This sequenceCtrl+Z only takes back the last few cuts, not the whole silence cut. That's why FLEDIT makes a copy of the sequence by default.
Auto Censor
Auto Censor listens to the speech, finds swear words and covers them with a beep, your own sound or plain silence. Nothing is cut: FLEDIT mutes the words with volume keyframes on the clip where the word was said. It runs on your computer, on the same engine as Transcribe, without uploading the recording. Available on the PRO plan.
1Censoring a sequence
Listen to - the tracks with speech: ALL or e.g. A1. Only these tracks get muted.
Range - In - Out (default) or Whole sequence.
Spoken language - the language of the video.
Click ANALYZE AUDIO. You'll see the sound wave with the mutes marked in red and a transcript with the swear words highlighted.
Check the result (section 2) and click CENSOR · N WORDS.
Apply to: New sequence (default) censors a copy named “… - censored” and leaves the original untouched. This sequence censors this sequence straight away, after you confirm.
No undo on This sequenceCtrl+Z won't remove the mutes (at most it removes the last beeps), and the panel has no undo button. That's why FLEDIT works on a copy by default. The mutes are Volume › Level keyframes in Effect Controls - that's where you remove them by hand.
Clips with a changed speed and reversed clips are skipped: the words on them stay audible, and FLEDIT tells you after censoring.
2Checking the result
The transcript has the filters All, Censored and Unsure and a Search… field. Double-click a word to switch its censoring on or off; a single click moves the playhead.
The Unsure filter collects the places to check: unclear parts and words that only sound like a swear word. The “N places to check” bar with Check one by one takes you through them: Censor (right arrow or drag right), Don't censor (left), Play again (Space).
Right-click a word: Always censor or Never censor. The word then goes on your list.
When you analyze several tracks, a Mix / A1 / A2 switch sits above the wave. Mix sounds the way the censored sequence will sound.
Edit mutes: drag the edge of a red field to mute less or more, or drag across an empty spot to mute a new part.
3What covers the word
None
Just silence, no sound.
Default beep
A classic beep. The default.
From library
Any sound from your User Library.
Sound options…
The Beep sound window: Volume, Label color, the part of a library sound to use (Edit in/out…) and what to do when the sound is shorter than the word: Loop or Play once.
Beeps land on their own Censor track at the bottom of the sequence.
4Which words, and how much of each
Level
Low (default) - strong swear words only. Hard - also milder words and insults. The COMPARE badge shows examples on hover.
Mute
Whole word (default) mutes the whole word. Keep the start leaves the start audible. Start and end leaves the start and the end and mutes the middle.
Audible start / Audible end
How much of the start and end of the word stays audible, as a percentage of the word or in milliseconds (Measure the audible part in).
Safety before / Safety after
A margin of silence before and after the word so nothing leaks through.
Fade
How gently the sound drops away and comes back.
Words written with stars, Unsure words, Sounds like a swear word
What else to censor: words the transcript wrote with stars, unsure swear words, and unsure words that sound like a swear word (these are orange). All three are on by default. Whatever FLEDIT doesn't censor by itself waits for you under the Unsure filter.
Presets: Beep, Mute only (no sound), Strict (Level Hard) and Custom. Save your own with Save as…. If your preset loses its sound file, it gets an OFFLINE badge.
5Your word list
Your words → Edit words… opens the Censored words window with two lists: Always censor and Never censor. Add adds a word, × removes it, Clear all empties the list and Done saves your changes. An asterisk stands for any ending: duck* also catches “ducks”. The list is shared by Transcribe and Auto Censor and works in every language.
For each of these languages FLEDIT also catches the core English swear words, and parts spoken in English are checked against the full English list. In any other language it finds only English swear words and the words on your list.
Zoom
The Zoom tab replaces the whole “keyframe the Scale by hand” routine. Grab a frame from the Program Monitor, draw a box around what you want to fill the screen, and click APPLY - FLEDIT works out the Scale and Position and writes the keyframes for you.
1Your first zoom
Select a clip on the timeline and park the playhead where the zoom should start.
Grab the frame - click the camera icon (or the “Snap preview” placeholder). FLEDIT pulls the current frame out of the Program Monitor into the preview.
Draw a box over the part of the picture you want to end up filling the frame. The badge on the box shows the resulting scale.
Click APPLY (or press Enter). The move is keyframed from where you are now to the framing you drew.
Grab a frame, draw a box, hit APPLY - a finished zoom on the clip.
You can also type the percentage. Click the percentage badge above the box and type a value. Enter applies it and leaves the box where it is, Shift+Enter also centers it. You can swap the two in Settings → Enter in the % field.
Preview navigation: scroll to magnify the preview, hold Space or the right mouse button to pan, and click the 100% chip to reset the view. This only changes how you look at the frame - the zoom you're building stays the same.
Zooming to another spot on the same clipAfter you apply a zoom the clip is already pushed in, so the preview no longer shows the whole picture. Grab the frame again with Wide view - the square with the arrows pointing out - and you get the full frame back even though the clip is zoomed. Draw the next box anywhere in it and hit APPLY.
2SET FRAME - reframe with no animation
The SET FRAME button (next to APPLY) sets the framing you drew without any movement. It's handy when the clip should sit tighter from the very start (e.g. just the face) before your first push-in, or when, after an earlier zoom, you want to jump to a different framing from the playhead with no animation.
3The toolbar
Duration
How long the move takes, in seconds or frames.
Zoom position
The button in the duration field: whether a new zoom starts at the playhead, is centered on it or ends there. The same setting lives in Settings → Zoom position (Start / Center / End). Favorites and macros can keep their own.
Ease
How the zoom accelerates. You can also pick any curve from Ease Keyframes, including the ones you saved yourself.
Target
Where the keyframes are written - Motion, Transform, or Vector (on graphic clips). Transform is added to the clip automatically if it isn't there yet.
Blur
Motion blur for the zoom - 0-360, 180 is the natural. Works when the target is Transform.
SET FRAME
Sets the framing with no animation, as if you simply set Position, Scale and Rotation yourself.
Grab frame
Camera icon - captures the current frame from the Program Monitor.
Wide view
Grabs the whole frame even when the clip is already zoomed in, so you can compose a pan from one spot to another.
Infinity zoom
Continuous push across the whole clip - see below.
100%
Zoom out. Grabs the full frame and selects the whole clip, so a single click on APPLY resets the framing.
Zoom on top of a zoom - FLEDIT asks before it overwritesBefore it writes anything, FLEDIT does a dry run and checks whether keyframes already sit inside your zoom window - your own, or an earlier zoom. If they do, it asks: “Existing keyframes”, with the numbers - how many Motion/Transform keyframes and over which stretch of time (between 2.40 s and 3.40 s, for example). Replace swaps what is inside that window for the new zoom; Cancel touches nothing. Keyframes outside the zoom window are left alone, and Replace can be taken back with the panel’s UNDO button.
Not every curve suits every animationYou can hand this any curve from Ease Keyframes - including your own, heavily bent or overshooting past the target. Worth knowing, though: some curves look great on one kind of move and wrong on another. A curve with a big overshoot (Overshoot, Elastic, Bounce) gives a short caption entrance a lovely kick, but on a slow move it can read as a jolt - and on a zoom it can travel outside the frame. That is not a bug, it is what those curves do. If a move looks odd, go back to a gentler curve (Smooth, Ease In-Out) and experiment from there.
Clips with changed speedZoom works correctly on clips after a Speed/Duration change (e.g. 50%, 200%, 0.1%). The exception is a reversed clip and a clip with Time Remapping: nest it (right-click → Nest) and zoom the nest.
4“Zoom needs more time than the clip has” - the Fit button
If the zoom is longer than what's left between the playhead and the end of the clip, a warning appears on the status row: “Zoom needs 2.0s, only 1.2s to clip end”. Click the Fit button next to it and the zoom is shortened to finish exactly at the end of the clip. You can also shorten the duration yourself, or move the playhead earlier.
5Infinity zoom - a continuous push across the clip
The infinity icon switches the tab into Infinity zoom: drag the crosshair onto the point the camera should move towards, set the direction and the speed, and click APPLY. The move runs across the entire clip, always at the one speed you picked.
Direction - IN pushes towards the anchor, OUT pulls away from it.
Speed - how much ground the move covers over the clip:
Very slowSlowMediumHigh
Infinity zoom works on several selected clips at once. A clip stretched in one direction (e.g. scale 130 × 100) keeps its proportions.
Clips with animation of their own are repaired firstInfinity zoom needs a clean carrier, so before it does anything it checks your selection and shows a prompt. There are two cases it can repair:
1. Zoom on Motion and Transform at once - a clip like that cannot be composed safely in one place, so FLEDIT offers to nest it: “This clip has zoom animation on both Motion and Transform - nest it and apply infinity?”.
2. Someone else’s keyframes on Motion alone - FLEDIT offers to move them to Transform: “This clip has keyframes on Motion - move them to Transform and apply infinity?”.
When both cases turn up in one operation, FLEDIT tells you about it and fixes the problem.
Infinity zoom - the anchor, the direction and the speed, with the move running across the whole clip.
6Recent, Favorites & hotkeys
Every zoom you apply is saved to the RECENT list in the sidebar. Click an entry to load that exact framing back into the preview. Click the heart to move a zoom into FAVORITES, where it stays for good.
Right-click a favorite for Bind to key, Rename, Zoom position, Sound… and Delete. The speaker icon in its row opens the sound choice directly (more in the sound section below).
Favorites also become commands in the SearchBar, under the Zoom Favorites category, so you can bind one to a shortcut or drop it into a macro. Fired from the SearchBar popup, a favorite asks where to place the zoom:
As saved in the favoriteStart at playheadCentered on playheadEnd at playheadAt clip startAt clip end
A keyboard shortcut places it the way it is saved in the favorite, and in a macro step you pick it from a list.
7Zoom sound effects (SFX)
FLEDIT can add a sound to a zoom: a whoosh, a hit or anything you keep in your User Library. The sound lands on the timeline together with the zoom, also when the zoom comes from a shortcut, the SearchBar or a macro. Turn it on with the speaker icon next to Settings (off by default). Infinity and SET FRAME stay silent.
You arrange the sounds in Settings → AUDIO EFFECTS:
Length groups
Sounds sit in groups by zoom length, e.g. from 0.5 to 1.5 s, so a short zoom gets a short sound and a long one a long sound. + ADD LENGTH GROUP adds a group, and + ADD SOUND inside a group adds sounds from your User Library.
Order
Sounds in a group play in turn, from the top, and the next one in line carries a NEXT badge. A sound you switch off is skipped, and the Restart order icon starts the line from the top again. A zoom that fits several groups takes the sounds of all of them in turn.
Zooms longer than every group
What a zoom longer than every group gets: Use the longest group (default) or No sound.
Zoom out uses
Zoom in sounds (default), Own list for separate zoom-out sounds, or No sound.
Pan uses
No sound (default), Zoom in sounds or Own list, e.g. separate swishes for pans. What counts as a pan sets how big a scale change has to be before a move counts as a zoom rather than a pan.
Sound settings
Click a sound in the list to set its Placement (Start / Center / End, where the sound sits against the zoom), Speed, Volume, Audio preset and Label color. That is also where you trim the file, move the sound to another group or duplicate it.
A favorite's own sound. Click the speaker icon next to a favorite, or right-click → Sound…, and choose:
Like other zooms - the next sound from AUDIO EFFECTS, while the speaker is on.
Its own sound - always the same chosen sound, even with the speaker off. Pick it from your User Library or from your zoom sounds.
No sound - this zoom always stays silent.
A macro step can override this: Sound: as in favorite, Sound: always or Sound: never.
The sound goes with the zoomReplace in the “Existing keyframes” question swaps the old sound for the new one, and Delete in ANIMATIONS ON CLIP removes the zoom together with its sound. UNDO takes the sound off too, unless you moved or trimmed it.
A missing sound fileWhen a sound is missing, FLEDIT skips it and plays the next one in the group. If they are all missing (or a favorite's own sound is), the zoom still lands on the timeline without sound and FLEDIT tells you. Fix opens the sound list: click Relink… there, then choose Only this one or Relink all to reconnect every sound from the new folder at once.
8Animations on clip - review, jump, delete
The ANIMATIONS ON CLIP button at the bottom opens a list of every zoom already living on the selected clip, with its range (110% to 240%), its timecode and the number of keyframes. Each row has three buttons: Go in jumps the playhead to the start of the move, Go out to the out point, and Delete removes that whole animation - the in and the out together, in one step, along with its sound.
9Settings
Settings have two tabs: GENERAL and AUDIO EFFECTS (sounds, see above).
Enter in the % field
What Enter does after you type a percentage: Keep in place leaves the box where it is, Center in frame centers it. Shift+Enter does the other one.
Zoom position
Where a new zoom sits against the playhead: it starts there (Start), is centered on it (Center) or ends there (End).
Box snapping
Magnetic guides while you draw or move the box: Off, Edges + center, or Edges + center + thirds. Hold Alt to bypass whatever you picked.
Default move style
The easing preselected for every new zoom.
Duration unit
Type transition lengths in seconds or frames.
Default duration
The starting length of every new zoom.
Sharpness guard
Warns you when the zoom pushes past what the footage can hold - the badge on the box turns orange, then red. Auto works it out from the clip's own resolution, so a 4K clip in a 1080p sequence can go to 200% without losing sharpness. You can also set the limit at 300% or 600%, or turn the warnings Off.
Live result preview
A small floating window showing the final framing while you draw. Drag it anywhere in the preview, or dock it to a side with its arrow.
After apply
Where the playhead lands once the zoom is created - jump to the end of the move, or stay in place.
Return clip to 100% scale
What the 100% button restores. Clip base value goes back to the framing you set yourself, Fit clip to frame fits the picture to the sequence frame, and Strict 100% sets the scale to 100% and centres the clip.
Wide frame shows
What the Wide view button captures. Clip base - your framing, without the FLEDIT zooms. Full frame - the raw clip without your Motion framing, and nothing changes on the timeline. A zoom drawn on the full frame starts from what you see: a clip with no keyframes first fills the frame, then zooms in.
Trail markers
Drops a marker at every zoom so you can see your zoom map on the timeline. Put them on the clip, on the sequence, or turn them Off. There's also a “trail marker” checkbox in the bottom bar to switch it per zoom.
10Undo
Zoom keeps its own undo - the UNDO button in the bottom bar steps back through the zooms you applied. Use it instead of Ctrl+Z, which won't take a zoom off. You can also remove a zoom from the Animations on clip list.
If Infinity nested the clip, UNDO also undoes the nest and the original clip comes back. If you changed something in the project after the Infinity, the nest stays and you undo it in Premiere.
UNDO also takes off the zoom's sound and the Transform effect, if FLEDIT added it. A Transform you changed after the zoom stays on the clip: “Zoom reverted - Transform kept (you changed it after the zoom)”.
11Errors & warnings - what they mean
Message
What it means
“Snap the preview first”
There's no captured frame yet. Click the camera icon or the preview placeholder.
“Select a clip with Motion on the timeline”
Nothing is selected, or the selected item has no Motion parameters to animate.
“Playhead is outside the selected clip”
The zoom is anchored at the playhead, so the playhead has to be over the clip.
“Stretch is not available on rotated clips”
The clip is rotated, so the box can't be stretched. Draw a proportional box instead.
“Box rotation is not available when Motion has non-uniform scale over the target”
The clip is already stretched, so the box can't be rotated on top of that. Zero the rotation, or switch the target to Motion.
“Clip has zoom animation on both Motion and Transform”
Accept the nesting prompt when FLEDIT offers it, or nest the clip yourself (right-click → Nest) and apply infinity to the nest.
“Frame export failed” / “Wide frame failed”
Premiere couldn't render the frame for the preview. It's usually busy - wait a moment and grab again.
“Nest bridge unavailable - restart Premiere”
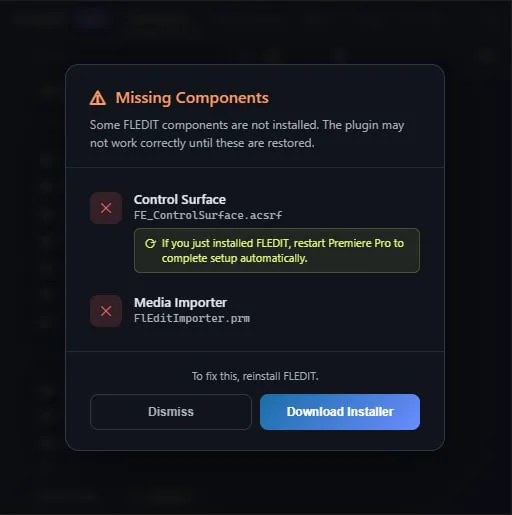
An internal component didn't load. Restart Premiere; if it persists see Missing Components.
“This clip plays in reverse - nest it (right-click > Nest) and zoom the nest”
The clip is reversed. Nest it and zoom the nest.
“This clip uses Time Remapping - nest it (right-click > Nest) and zoom the nest”
The clip has Time Remapping. Nest it and zoom the nest.
“Nest did not go through - close the "Nested Sequence Name" window in Premiere (if open) and try again”
Premiere didn't create the nest. Close the nest name window if it is open and try again.
“Zoom keyframes on this clip look off”
FLEDIT found damaged zoom keyframes on the clip. Fix repairs them (one undo step), Not now leaves the clip as it is.
SearchBar
SearchBar is a tool for sending commands to Premiere. Open SearchBar, find what you need and apply it - effects, transitions, presets, clip operations, custom macros. SearchBar is really many modules in one.
SearchBar popup - the pop-up search.
Keyboard shortcuts - bind any function to a key.
Macros - chain multiple commands into one.
Whatever you reach for in Premiere, you can fire it from the SearchBar. It searches across:
Clip commands - every one-click operation from the Clip tab (the complete list is further down).
Transitions - all of Premiere's video and audio transitions.
Effects - all of Premiere's video and audio effects, including audio plugins (VST, VST3 and AU).
Presets - your saved .prfpset effect presets.
Animations - the built-in transitions and effects from the Animations tab (e.g. Push Up, CRT effect, Adjustment Layer).
MOGRTs - both the built-in ones and the ones you've imported yourself.
Media - clips, music and SFX from your User Library folders in the FLEDIT Animations tab.
Macros - your own multi-step macros.
The full breakdown of each category is in the table further down.
1SearchBar popup - instant access from anywhere
Press Ctrl + Space (Win) or Opt + Space (Mac) to open the SearchBar popup. Type any effect, transition, preset, or command name - arrow keys to navigate, Enter to apply.
Opening the SearchBar popup and applying a function to clips on the timeline.
2Keyboard shortcuts - bind any function to a key
Open the SearchBar tab in the panel, find any command, click the shortcut field next to it (Not set or the current shortcut), and press your desired key combination. FLEDIT reads your active Premiere keyboard profile (.kys) and refuses to bind anything that's already used by Premiere - you'll see a clear warning explaining the conflict.
Changed your Premiere shortcuts? Restart PremiereFLEDIT reads that conflict list from Premiere's .kys profile, and Premiere only rewrites that file when it restarts. So if you've just changed your keyboard layout or rebound keys in Premiere Pro, restart Premiere Pro - that way the .kys updates and FLEDIT knows about your new shortcuts.
FLEDIT also detects conflicts within its own shortcuts.
If another app (Discord, OBS, screen-capture tools) holds the same hotkey at OS level, FLEDIT may warn that the shortcut failed to register - though this won't necessarily happen.
Binding a function to a key - FLEDIT blocks combinations already used by Premiere, then a free key gets assigned and triggered on a clip.
3Macros - chain several functions into one click
Macros let you turn repetitive sequences into a single step. Click Create Macro, name it, then add steps from the list. Some steps also need you to set how they behave - e.g. with time interpolation you can choose frame blending or optical flow. There's no fixed delay between steps - FLEDIT waits for each operation to actually finish before the next one fires. Bind the macro to a keyboard shortcut or run it from the SearchBar popup like any other command.
Things macros can do really well:
Apply a multi-step look (e.g. set speed 50%, time interpolation = optical flow, nest, warp stabilizer = instant stabilised slow-mo).
Smart targeting - the macro remembers the clip(s) you had selected, and after a step that creates something new (e.g. nesting) the freshly made clip becomes the target, so the next step lands on it.
Import then act - if a step imports media, the inserted clip is auto-selected, so the next step (e.g. “adjust volume -10 dB”) applies straight to it.
Media destination & trim - a media step can drop the clip onto the timeline or load it into the Source Monitor (handy for using it as an overwrite source), and you can set the media's in / out points so only that range is used.
Premiere keyboard shortcuts as a step - a macro step can be a native Premiere Pro keyboard shortcut. FLEDIT fires those keys for you, exactly as if you'd pressed them, so you can automate anything Premiere exposes as a keyboard shortcut and chain it with FLEDIT actions.
A transition on the clicked cut - if the first step of a macro is a transition (video or audio), you don't need to select a clip. Click the cut and run the macro. If the transition doesn't apply, the macro stops before inserting anything.
Where media land - a media step set to Add to timeline has a list: At playhead, At transition start, Centered on transition, At FLEDIT animation start, Centered on FLEDIT animation. The transition and animation options refer to what an earlier step of the same macro added. Every transition gets its own copy of the media. If that media is already there, the copy is skipped, so running the macro again doesn't create duplicates.
Building a “Censor Beep” macro - a trimmed beep from FLEDIT Media, then native Premiere shortcuts as steps: Mark Clip and Overwrite, finishing with Set Volume.
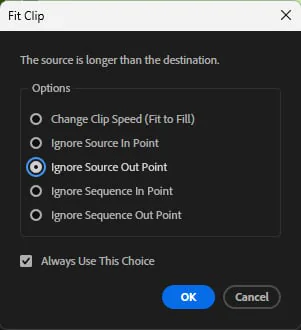
Using Overwrite? Pick Ignore Source Out PointWhen a macro step uses Overwrite and the media is longer than the destination, Premiere shows the Fit Clip dialog and waits for your answer - the macro sits still. Choose Ignore Source Out Point and tick Always Use This Choice so the macro runs correctly, without being asked again.
Premiere’s Fit Clip dialog - Ignore Source Out Point plus Always Use This Choice.
One undo for the whole macro.One Ctrl+Z (Cmd+Z) rolls back the entire macro at once. The same goes whenever FLEDIT does several things in one go - applying an adjustment layer to three selected clips, say.
Building a “Slow-mo & stabilize” macro - Set Speed, Time Interpolation and Nest Clips - then triggering it from the SearchBar popup.
4Global SearchBar popup hotkey & Monitor state
The SearchBar popup opens via a global hotkey (default Ctrl + Space on Windows, Opt + Space on macOS). It must not match a shortcut used by Premiere. If you assign a conflicting key, the FLEDIT Monitor switches off automatically - the SearchBar popup hotkey stops working, but you can still open the panel with the Open SearchBar button. Pick a free combination and the Monitor turns back on.
Setting a conflicting hotkey (Monitor switches off - SearchBar popup opens via the button), then choosing a free combination (Monitor back on, hotkey works again).
5Refreshing the effect list
FLEDIT auto-detects effects, transitions and presets every time you open the SearchBar popup or the SearchBar tab. If something brand-new doesn't show up - for instance a preset you just created - click Refresh Effects to force a rescan.
Clicking Refresh Effects in the SearchBar tab and inside the SearchBar popup.
6What you can search - categories
Category
What it contains
Tier
Transitions
All Premiere video transitions
Free
Video Effects
All Premiere video effects
Free
Audio Transitions
All Premiere audio transitions
Free
Audio Effects
All Premiere audio effects
Free
Presets
Your .prfpset presets
Standard
Clip
One-click clip operations (see below)
Standard
User Macros
Macros you've built
Pro
FLEDIT Animations
Built-in transitions/effects from the Animations tab
In the SearchBar tab you can double-click any item to apply it straight away - no need to select it and press Enter.
7Presets - clips and the Audio Track Mixer
Premiere's .prfpset presets aren't limited to clips. If you have an audio chain saved as a preset, you can apply it to an audio track in the Audio Track Mixer - pick the preset in the SearchBar and target a track in the Audio Track Mixer (the Master track isn't supported). See Known Limitations for Premiere limitations around presets.
Applying an audio preset to a track in the Audio Track Mixer.
8“Clip” commands - the full list
One-click operations on the selected clip(s):
Clip and time
Command
What it does
Reverse Clip
Reverses playback of every selected video and audio clip, keeping the speed.
Set Speed
Type a percentage. Modes: Speed + keep clip duration, Speed + change clip duration, Speed + Ripple; the Maintain audio pitch switch keeps voices from changing pitch.
Set Duration
Type a length in seconds; Change clip duration or + Ripple; Maintain audio pitch as above. The Maintain audio pitch setting is remembered and shared by both commands.
Time Interpolation
Frame Sampling / Frame Blending / Optical Flow for the selected clips.
Enable / Disable Clip
Enables or disables the selected clips.
Rename Clip
Gives every selected clip the name you type.
Replace with AE Composition
Replace With After Effects Composition (Dynamic Link).
Scene Edit Detection
Opens the cut-detection dialog for the selected clip.
Synchronize Clips
Opens the synchronize dialog for the selected clips.
Audio Channels
Opens Modify → Audio Channels (channel mapping).
Upgrade Caption to Graphic
Turns the selected captions into Essential Graphics - only then can you animate them in Text Animate and arrange them with Positioning.
Picture and sound
Command
What it does
Fill Frame / Fit to Frame / Scale to Frame Size
Premiere's native scale-to-frame commands.
Set Opacity
Sets opacity 0-100 % on the selected video clips. Works like Set Scale - with the Replace animation switch and a single undo.
Set Scale
Sets scale in % on the selected clips (details below).
Set Position
Sets position X / Y. An empty field leaves that axis unchanged.
Set Rotation
Sets rotation in degrees.
Set Anchor Point
Sets Anchor Point X / Y the same way Effect Controls does. To move the anchor without the picture jumping, use Anchor Control.
Set Blend Mode
Pick from the list of all Premiere blend modes (Normal… Luminosity).
Set Label Color
The label list is read live from your Premiere settings (custom names too).
Set Volume
Absolute level in dB (up to +15; “mute” silences). Removes volume keyframes.
Adjust Volume
Relative change, e.g. +3 or -10 dB; if the clip has volume keyframes, every one of them is shifted.
Remove Attributes / Paste Attributes
Open Premiere's native dialogs.
Remove Transitions
Removes every video and audio transition touching the selected clips.
Nesting
Command
What it does
Nest Clips
Nest with the name confirmed automatically.
Nest Individual Clips
Every selected video clip in its own nest; All selected clips or Every X clip… (see the point below).
Unnest Sequence
Unpacks the selected nests back into the sequence, trimmed to their In/Out; one undo.
Selecting
Command
What it does
Select All Clips After Playhead
Selects every clip on all tracks that ends after the playhead (the clip under the playhead too). No prior selection needed.
Select All Clips Before Playhead
The same for clips that start before the playhead.
Select All Disabled Clips
Selects every disabled clip.
Select Every X Clip
Thins out the current selection - every X-th clip stays (see the point below).
Markers
Command
What it does
Clear Seq Markers / Clear Selected Clip Markers / Clear All Clip Markers / Clear All Markers
Four scopes of marker clearing - described in “Clearing markers” below.
Tracks, project, sources
Command
What it does
Delete Empty Tracks
Removes empty tracks from the sequence.
Remove Unused
Removes unused media from the project.
Default Source Assignment
Restores default source patching.
Toggle All Source Video / Toggle All Source Audio
Turns all video / audio source patchers on or off.
Generators
Command
What it does
Adjustment Layer / Black Video / Bars and Tone / Transparent Video / Color Matte
Ask: Add at playhead or Apply to selected clips (described in “FLEDIT MOGRT, Effects, Media” below). Color Matte also opens the native colour picker. FLEDIT creates them once in the FlEdit Files → FlEdit Assets bin and reuses them.
Nesting and unnesting clips straight from the SearchBar popup.
9Set Scale, Position, Rotation and Anchor Point - values from the keyboard
Target - FLEDIT picks Vector Motion for graphics and captions and Motion for everything else. Transform you pick by hand with the arrow keys. It only works on clips that already have that effect, because FLEDIT does not add it.
Replace animation
Off
Clips where this property has keyframes are skipped.
On
The keyframes on this property are deleted and a fixed value is set.
Your choice is remembered, even after a Premiere restart.
10Working on every 2nd, 3rd, 4th... clip
Two commands let you treat a long run of clips as a pattern instead of picking them one by one.
Select Every X Clip thins out a selection. Select a whole run of clips, run the command, type the interval - 2 keeps every 2nd clip, 3 every 3rd, and so on - and everything else is deselected. What remains is a normal Premiere selection you can do anything with: apply an effect, change the label colour, delete, nest.
Counting is by position on the timeline, not by trackFLEDIT sorts the selection by where the clips start and keeps clips number X, 2X, 3X. Linked video and audio (or clips stacked on several tracks at the same moment) count as one item, so a V+A pair is never split in half.
Nest Individual Clips now asks how far to go before it runs:
All selected clips
Every selected clip becomes its own nested sequence - the original behaviour.
Every X clip...
Type an interval and only clips X, 2X, 3X... are nested. The rest are left alone.
The same choice is available when you add Nest Individual Clips as a step inside a macro, so a macro can nest every second clip and then keep working on the results.
Why would you want this?When you have a run of clips with an Infinity zoom on them and you want a zoom on every other clip, to hide the cuts.
Select Every X Clip - every second clip survives out of a long run.
Nest Individual Clips → Every X clip - only every X-th clip gets nested.
11Clearing markers - four different commands
Premiere keeps markers in two completely separate places, and FLEDIT gives you a command for each combination so you never wipe more than you meant to.
Command
What it removes
Clear Seq Markers
Every marker on the timeline ruler of the active sequence. Clip markers are untouched.
Clear Selected Clip Markers
Clip markers on the clips you have selected.
Clear All Clip Markers
Clip markers on every piece of media in the project - nothing needs to be selected.
Clear All Markers
Both at once: the active sequence's timeline markers plus every clip marker in the project.
Clip markers live on the source, not on the clipThis is how Premiere works, not a FLEDIT choice: a marker you set on a clip is stored on the master clip in the Project panel. Clearing it from one copy clears it from every copy of that media - on other tracks, in other sequences, and in the Source Monitor.
Your Notes markers are safeThe “all clip markers” commands don't touch sequence markers - which includes markers from Notes; only Clear Seq Markers and Clear All Markers remove those. And even then your notes survive: Notes spots the missing markers and asks what to do with them (see When markers change while Notes isn't watching).
12FLEDIT MOGRT, Effects, Media - the Animations tab from the SearchBar
Pro extends the SearchBar with three categories that mirror your Animations tab:
FLEDIT MOGRT - drop a built-in or user-imported MOGRT straight onto the timeline.
FLEDIT Animations - place any built-in transition or effect on the timeline (e.g. glitch, push up, crt effect).
FLEDIT Media - insert any media from your User Library folders (e.g. a censor beep). You pick the destination: drop it on the timeline at the playhead, or load it into the Source Monitor to use as an insert / overwrite source.
Adding a MOGRT to the timeline through the SearchBar popup.
Adding the Push Up transition and an Adjustment Layer through the SearchBar.
Adjustment Layer, Black Video & other generated clips - where they land. When you add a generated clip like an Adjustment Layer or Black Video, FLEDIT asks where to put it:
Add at playhead - a default-length clip is placed at the playhead, on the first free track.
Apply to selected clips - FLEDIT places a separate clip above each selected clip, on a free track above it, trimmed exactly to that clip's bounds. The layer follows your cuts - select a clip split into three parts and you get three separate adjustment layers, one over each piece. Ideal for e.g. color grading or an effect across the chosen shots.
Under the clip when there is space below - an option in a macro step, with Apply to selected clips. FLEDIT puts the layer under each selected clip if there is a free track there. When there is no room, e.g. the clip sits on V1, the layer goes above the clip as before. Nothing on the timeline is ever overwritten.
Adding a censor beep from FLEDIT Media to the timeline.
13Zoom Favorites, Ease Keyframes & Anchor
Two more Pro categories come from the newer tools:
Zoom Favorites - every zoom you starred in the Zoom tab, ready to bind to a key or drop into a macro. Fired from the SearchBar popup, it asks where to place the zoom - as saved, at the playhead, or at the clip start or end, among others (more in Zoom).
Ease Keyframes & Anchor - Anchor Control, Ease Keyframes and Motion to Transform sit pinned at the top of the category, followed by every built-in ease curve, every curve you saved, and every anchor preset. All of them are bindable.
14Favorites
An effect marked with the heart lands in the Favorites group - at the top of the tab and in the popup.
15Shortcut profiles - export & import
Export your keyboard shortcuts to a JSON file and re-import them on another computer.
One caveat Keyboard shortcuts are bound to a specific effect/preset/macro name. If that item has been renamed, that particular shortcut won't re-bind on import.
Exporting and re-importing a shortcut profile.
16Errors & warnings - what they mean
When a problem occurs during an operation, FLEDIT shows a short message.
Message
What it means
Shortcut conflicts & registration
“Shortcut … is used by Premiere” / “blocked by Premiere Pro”
The key you picked is used by Premiere. Change it in Edit → Keyboard Shortcuts, or choose a different key in FLEDIT. After changing Premiere's shortcuts, restart Premiere so the .kys updates.
“… blocked by another application”
Something running in the background (Discord, OBS, a screen-capture tool, an OS shortcut) already owns that combination. Close that app or pick a different keyboard shortcut.
“Searchbar: already used for …”
The combination is already assigned to another FLEDIT command.
“… shortcut(s) failed to register”
One or more keyboard shortcuts couldn't be assigned. (usually another app is holding them)
“Global shortcut is occupied - change it first”
The global SearchBar popup keyboard shortcut clashes with something, so the Monitor won't start. Pick a free key combination and it turns back on.
Macros
A “Broken” badge / “X of Y step(s) unavailable”
One of the macro's steps points at something that no longer exists: a deleted preset, an uninstalled effect, a missing MEDIA file. Open the macro and fix or remove that step.
“Macro … has N broken step(s) - edit it to fix”
You tried to run a macro that still has broken steps. Edit it first.
A single step fails mid-run
If a step can't run (e.g. nothing is selected), FLEDIT skips it and the macro keeps going. Macros wait for each step to finish before the next, so there's no timing to tune. The exception: when the transition in the first step doesn't apply, the macro stops.
“Transition not applied - click a cut or select a clip, then run "…" again.”
The transition in the macro's first step had nowhere to go.
“Step "…" skipped - no transition was added before it.” / “…no FLEDIT animation…”
The step should land at a transition or animation, but no earlier step in the macro adds one.
Nothing to act on
“Open a sequence first”
There's no active sequence; open or create one.
“Select a clip on the timeline” / “Select a video clip first”
The command needs one or more (video) clips selected.
“Enter a duration first” / “Enter a speed value first”
Commands like Set Speed or Set Duration need a value typed in before you apply them.
“No room to extend - next clip is in the way (use Ripple)”
Set Duration would extend the clip over the next one. Choose Change clip duration + Ripple, which pushes the rest of the timeline along.
“Stopped at next clip - shorter than asked (use Ripple)”
Set Duration extended the clip only up to the next clip. You get the full length with Change clip duration + Ripple.
“Transition not applied - click a cut or select a clip first”
Nothing is selected and the playhead isn't on a cut.
“… is animated on all selected clips (keyframes) - turn on Replace animation”
Every clip has keyframes on this property.
“No Transform effect on the selected clips” / “No Vector Motion on the selected clips”
The chosen target doesn't exist on the selected clips.
Effects not found / refreshing
“Refresh timed out - try again”
The effect scan didn't finish in the allotted time. (a very heavy timeline can be the cause)
“… command(s) not found (effect may not be installed)”
When importing keyboard shortcuts, some of them point at effects or presets that aren't installed on this machine, so they're skipped.
“Transition not available in this Premiere version”
That transition doesn't exist in your Premiere build.
Premiere busy / engine not ready
“Premiere is busy - try again in a moment” / “Premiere engine not ready”
Premiere is tied up (a heavy operation, or the timeline). Wait a moment and retry - see the performance note in Known Limitations.
“Another process running - please wait”
A FLEDIT command is already executing. Let it finish before firing the next one.
“Command timed out” / “Command did not respond” / “Unnest timed out”
The action didn't get a reply in the allotted time. Retry; if it keeps happening on a huge timeline, that's the CEP performance limit, not a bug.
“Control Surface not available - command skipped” / “FLEDIT engine not loaded - restart Premiere”
A native component didn't load. Restart Premiere; if it persists, reinstall (see Missing Components).
Licensing
“License required - activate FLEDIT first”
Activate your license (or choose the Free plan) before using this.
“This feature requires … plan”
The command you triggered isn't included in your current plan.
Ease Keyframes
Ease Keyframes lets you draw any curve you like - or pick one from a library - and applies it to keyframes that are already on the clip.
One window, three editorsEase Keyframes shares a window with Anchor Control and Motion to Transform - the tabs at the top switch between them, and the undo arrow in the footer steps back through whatever you applied last, on any of the three. Open the window from the SearchBar (category Ease Keyframes & Anchor), from a keyboard shortcut, or from the buttons in the SearchBar tab of the panel.
It follows your selectionClick a different clip and the editor rescans on its own; the rescan button (the circular arrow) forces a rescan if you ever need it. The counter next to it shows how many clips the operation will hit.
1How it works
Select a clip that already has keyframes - on Motion, Opacity, the Transform effect, or in fact any effect you've keyframed. Select several clips to ease them all at once.
Choose what to ease with the detection dropdown, and check the parameter chips above the graph.
Pick a preset or drag the handles, then hit Apply Ease.
2Detection modes - which keyframes get the curve
Playhead
Only the pair of keyframes surrounding the playhead. Park the playhead between two keyframes and ease just that move.
Whole clip
Every consecutive pair of keyframes on the clip.
In to out
Every pair that sits inside the sequence In/Out range. Set In and Out on the timeline first.
3Parameter chips - what gets eased
The row above the graph lists every parameter on the clip that actually has keyframes - Motion Position, Scale, Rotation, Opacity, a Transform effect, a Gaussian Blur, anything. Click a chip to include or exclude it. The small down arrow at the end of the row expands it when there are more chips than fit. When a clip carries several copies of the same effect they're numbered like Effect Controls - Transform 1 is the topmost one.
4Drawing the curve
Drag the two handles for a classic bezier, or:
Double-click the graph to switch to a multi-point curve. Double-click again to add points, double-click a point to remove it.
Drag points anywhere. The grid snaps by default - hold Alt for free placement.
Speed switches to a speed graph, like After Effects - the peak is the fastest moment of the move.
5Motion preview - Play
The Play button (next to Speed, below the graph) plays the movement in a loop so you can see it, not just the curve. A ball rides along the curve (in Speed view - along the speed graph), and the vertical bar on the right of the graph shows the movement itself: a dot travels between the start point and the target, overshoot past the target included - exactly the way the picture would move.
Play - the ball rides the curve while the bar beside the graph shows the movement itself, overshoot included.
6Other editor controls
Pair by pair / Flow through keys / One single move
The list next to the scope decides how the curve treats a clip with many keyframes. Pair by pair - every segment between two keyframes gets the curve on its own, so the move slows down and sets off again at each keyframe. Flow through keys - one smooth curve through all the keyframes (needs at least three): the move flows through the middle keyframes without stopping at them. One single move - the whole clip as one move from the first keyframe to the last.
Smooth turns
With Flow through keys and One single move it smooths out sharp turns in the path - the picture rounds the corner instead of braking at the keyframe. Leave it off for Scale and Opacity.
Sliders below the graph
They work on the built-in shapes and change their character: how high a Bounce bounces, how many times an Elastic wobbles, how many steps Steps has, how sharp a Whip is - the slider label tells you what it changes right now. The second slider (main) sets how much time the main move takes and how much goes to what follows it - a quick arrival and long bouncing, say, or the other way round.
Mirror
Reverses the motion in time - instead of a soft start you get a soft landing, and a bounce at the end moves to the start. Click again to flip back.
Reset
Hold for a second to go back to the default curve.
100%
Graph zoom - zoom with the mouse wheel, pan with Space; click to go back to 100%.
Curve points
Click a point and you can type its exact values (time / val) and set whether it turns softly (Smooth) or sharply (Corner).
Copying a curve
You can send a curve to someone as text: Ctrl+C on the graph, Ctrl+V on their side.
“N skipped”
That many selected clips have no keyframe pair in this scope - they will be skipped.
Applying againIf a clip already has a curve (dense keyframes), FLEDIT asks: Skip those / Apply to all / Cancel, because a second curve can ruin the first one.
7Preset library
The Presets drawer in the footer holds the built-in curves plus everything you save yourself (+ Save curve). Built-ins cover the usual suspects and a few things a two-handle bezier simply can't do:
Curves are shared across FLEDIT - the same list feeds the Ease selector in the Zoom tab and in Text Animate. Every built-in and every saved curve is also a bindable SearchBar command, so you can put “Ease: Overshoot” on a hotkey; FLEDIT then asks which detection mode to use.
Your keyframes stayFLEDIT only adds new keyframes between yours - neither their values nor their timing is touched. Undo simply removes the added ones.
What it will not touchTime Remapping is not supported.
In practice: park the playhead between two keyframes, solo the Position chip, pick Overshoot and apply. The same run works on several clips at once.
8Errors & warnings - what they mean
Message
What it means
“No keyframe pair in this scope”
Nothing to ease where you're looking. Move the playhead between two keyframes, or switch the detection mode to Whole clip.
“Set sequence In/Out first”
The In to out mode needs an In and an Out marked on the timeline.
“Select a clip on the timeline”
Nothing is selected.
“Scan timed out - hit rescan”
The scan didn't finish in time, usually on a very heavy timeline. Hit the rescan button.
“Premiere is busy - try again” / “Another process running”
Another FLEDIT operation is still running, or Premiere's scripting engine is tied up. Wait a moment.
Anchor Control
The Anchor Point decides what a clip scales and rotates around. Move it in Premiere and the picture jumps across the screen, so you have to fix Position by hand afterwards. Anchor Control moves the anchor and compensates Position in the same breath - the picture does not move at all.
One window, three editorsAnchor Control shares a window with Ease Keyframes and Motion to Transform - the tabs at the top switch between them, and the undo arrow in the footer steps back through whatever you applied last, on any of the three. Open the window from the SearchBar (category Ease Keyframes & Anchor), from a keyboard shortcut, or from the buttons in the SearchBar tab of the panel.
1How it works
Select one or more clips.
Pick the spot - click one of the nine handles on the preview box, drag freely inside it, or type X / Y as percentages.
Hit Apply Anchor.
2Mode - what the spot is measured against
The dropdown has two groups, and the difference matters:
Option
What happens
Visible content (drawn pixels)
Each layer on its own
Every clip gets its own anchor, centred on what that clip actually draws - the letters of the text, the logo, not the empty space around them.
All layers as ONE unit
One shared anchor for the whole selection, based on the combined bounds of everything visible. Rotate the selection and it turns as a single object.
Whole frame (layer box)
Each layer on its own
Every clip gets its own anchor, measured on its full rectangle regardless of what's drawn in it.
Whole sequence
The anchor lands on a fixed point of the sequence frame - the same screen position for every selected clip.
Ignore drop shadowsOnly shown in the visible-content modes. Soft shadows and glows count as drawn pixels, which pulls the anchor off-centre. Tick this and the anchor centres on the letters instead of the glow.
3Which parameters get the anchor
When a clip has more than one candidate - Motion, Vector Motion (graphics and titles), one or more Transform effects, and in graphics also Text, Shape and Group layers - chips appear above the box. Click to toggle; pick several and FLEDIT applies to each of them in turn. Each pass is its own undo step, so the undo arrow peels them back one at a time.
In the Whole frame modes the Text, Shape, Group and Vector Motion chips are red, because those layers have no frame of their own. Switch to Visible content instead. Video and stills inside a graphic are not supported.
4Presets
The Presets drawer saves the whole state - mode, X/Y, chosen parameter, the shadow option. Click a preset to load it, double-click to apply it straight away, right-click to rename or delete. Saved anchors also appear in the SearchBar so you can bind them to a key.
Adjustment layers aren't supportedThey have no picture of their own to anchor to. If your selection is nothing but adjustment layers you'll see “No Motion in selection”.
Animated Scale or RotationIf Scale or Rotation is animated, FLEDIT matches the Position compensation to each of their keyframes - the picture doesn't jump.
Anchor Control - picking a point in the preview box and hitting Apply Anchor; the picture stays where it was.
5Errors & warnings - what they mean
Message
What it means
“Park the playhead over the clip first”
A visible-content mode needs a frame to measure and couldn't reach one.
“Nothing visible at the playhead”
The clip draws nothing at the frame that was measured - check that the content is actually on screen there.
“Frame export failed - try again”
Premiere couldn't render the measuring frame. It's usually busy; retry in a moment.
“No Motion in selection (adjustment layers not supported)”
Nothing in the selection has an anchor to move.
“Select a clip on the timeline”
Nothing is selected.
“Scan timed out - hit rescan”
The scan didn't finish in time, usually on a very heavy timeline. Hit the rescan button.
“Premiere is busy - try again” / “Another process running”
Another FLEDIT operation is still running, or Premiere's scripting engine is tied up. Wait a moment.
Motion to Transform
Premiere's Motion effect cannot render motion blur. The Transform effect can. This tool moves your existing animation from one to the other in a single click, so a move you already like suddenly gets proper blur.
One window, three editorsMotion to Transform shares a window with Ease Keyframes and Anchor Control - the tabs at the top switch between them, and the undo arrow in the footer steps back through whatever you applied last, on any of the three. Open the window from the SearchBar (category Ease Keyframes & Anchor), from a keyboard shortcut, or from the buttons in the SearchBar tab of the panel.
1How it works
Select a clip animated with Motion - or with Vector Motion if it's a graphic or a title.
Set the options and hit Apply Transfer.
The animation lands on a Transform effect (added automatically if the clip doesn't have one) and the Motion keyframes are cleared, so the geometry is never counted twice. The move looks exactly the same - but now it can blur.
Position, Scale, Scale Width and Rotation are carried over. The scope is fixed to Whole clip: a partial range would leave half the animation on Motion and half on Transform.
2The options
Motion blur
Turns on the Transform effect's Shutter Angle. The stepper next to it sets the strength, 0-360; 180 is the natural, camera-like look.
Use Ease on keyframes
Moves the keyframes across with the curve from the Ease tab applied. Off means the original keyframe timing is preserved exactly.
Channel chips
The row under the scope dropdown lists what's animated on the clip - Position · 4 keys, Scale · static, Rotation · 3 keys. Lit chips move over to Transform; click one to switch it off and that channel stays on Motion instead. Position is recalculated so the picture stays identical.
“Use Ease” greys out on an already-eased clipIf the movement already got its curve from Ease Keyframes, FLEDIT spots the dense keyframes and disables the option - putting a second curve on top of the first one would wreck the motion. Turn a channel off and the check re-runs on what's left.
Undo: the undo arrow restores the original Motion keyframes and clears everything it put on Transform.
Moving the animation off Motion onto the Transform effect with Motion blur switched on.
3Errors & warnings - what they mean
Message
What it means
“No Motion on this clip”
The clip has neither Motion nor Vector Motion to take animation from.
“No Motion keyframes to move”
There's a Motion effect but nothing is animated on it.
“Transform on this clip is already in use”
The Transform effect already carries an animation. Remove it first, or the two would collide.
“Non-uniform Scale and Rotation must move together”
Select both chips - Scale and Rotation - and apply again.
“Select a clip on the timeline”
Nothing is selected.
“Scan timed out - hit rescan”
The scan didn't finish in time, usually on a very heavy timeline. Hit the rescan button.
“Premiere is busy - try again” / “Another process running”
Another FLEDIT operation is still running, or Premiere's scripting engine is tied up. Wait a moment.
Paste Image
Paste any image from your clipboard straight onto the timeline - screenshots, browser images - without ever leaving Premiere.
1How it works
Anything in your macOS or Windows clipboard that's an image (a screenshot, or something copied from a browser) can be dropped on the timeline with one click of Paste Image - or the keyboard shortcut Ctrl + V (Windows) / Ctrl + Cmd + V (macOS). FLEDIT saves it as a PNG, imports it into your project, and places it at the playhead.
Taking a screenshot, clicking Paste Image - the image appears on the timeline.
2Keyboard shortcut and the Monitor toggle
On Windows you don't even have to click the button - just press Ctrl + V and the clipboard image drops straight onto the timeline. On macOS that keyboard shortcut isn't used: macOS can hand FLEDIT the wrong item from the clipboard, so pasting uses the Ctrl + Cmd + V combination instead.
The Monitor switch at the top of the panel controls whether FLEDIT listens for that hotkey globally. Turn it off if you want Premiere's normal paste behaviour back - the FLEDIT hotkey is then disabled. If the clipboard doesn't contain an image when you trigger the paste, FLEDIT tells you so.
Toggling the Monitor on and off, plus the “no image in clipboard” notice.
3Save Location - where the image lives on disk
The Save Location setting tells FLEDIT where to copy the clipboard image on your drive. You have two options:
Browse - pick any folder manually. The choice sticks across sessions until you change it.
Use Project Folder - FLEDIT looks at the currently open Premiere project and creates an assets_photo subfolder right next to your .prproj file. Every pasted image goes there. Open a different project and FLEDIT creates a fresh assets_photo folder for that one too.
Picking a manual save location, then switching to “Use Project Folder”.
4Import to bin - where the image goes inside Premiere
Import to bin chooses the destination bin in your Project panel. Default is assets_photo, which FLEDIT creates automatically the first time you paste. Pick a different bin from the dropdown, or click + New Folder to create one on the fly.
Choosing a bin, pasting, and confirming the image lands in the right place in the Project panel.
5Filename prefix
The Filename prefix field prepends a string to every pasted file's name, so you can find your screenshots in seconds. Default is Screenshot; change it to anything (e.g. Reference, ClientFeedback). Files are saved as {prefix}_{timestamp}.png.
Filename rules The prefix has to be a valid filename, so FLEDIT keeps it to plain English letters, numbers and basic symbols. Anything outside that - spaces, the characters Windows / macOS don't allow (< > : " / \ | ? *), and any accented or non-English letters, including Polish ones like ł ą ę ó - is automatically replaced with an underscore _ when the file is saved. So use an underscore or a dash as a separator (e.g. Client_Feedback, Project-A).
6Pasted Clip Length - how long the pasted image is
Default - the image gets the length Premiere gives still images. Custom - you type your own length in seconds, e.g. 2 or 1.5. The arrow keys change it by 0.1 s, and by 1 s with Shift.
One Ctrl+Z (Cmd+Z) undoes the whole paste.
Timer
Track every minute you spend on a project, automatically or manually. The Timer detects which Adobe app has focus, so you can see exactly how much time went to editing in Premiere vs. animation in After Effects. Track full stats, export reports, calculate earnings.
1How a project gets created & tracked
Open a .prproj in Premiere - the Timer creates a project for it automatically and starts tracking. Defaults come from Global Settings. The link between Premiere and the Timer project is the project file path; reopening the same .prproj later resumes time tracking.
FLEDIT must be open for the Timer to run, but the Timer tab doesn't have to be visible - it tracks in the background while you work in any other FLEDIT tab.
A project view with the timer running - today's time, total, sessions, and the linked Premiere project.
2Project view - what you see
The active project view shows everything in one place:
Total time on this project
Sessions logged this week
Today's time on this project
Tracking mode currently in use (e.g. auto/manual)
The linked Premiere project name
Sessions from previous days, broken down by Adobe app
Click any Adobe app on a session to expand the day's individual sessions for that app.
Going back from the project view to the full list of projects.
3Project Settings
Open a project and click the Settings icon to edit:
Project name
Rename freely. The Timer remembers which Premiere project it was originally linked to.
Linked project
Change or unlink the .prproj currently linked to this Timer project.
Category
Assign to an existing category or create a new one.
Client
Assign to an existing client or create a new one.
Tag
e.g. long, short, advert, animation. Helps you filter later.
Billing
Hourly - FLEDIT multiplies tracked hours by your hourly rate. Flat rate - you set a fixed amount for the project; FLEDIT divides it by the time you spend, so you can see your effective hourly earnings. In the statistics the project shows up as the flat amount you entered.
Production
How many hours / GB / cameras of source material.
Finished duration
Final length of the delivered film.
Video link
URL to the published video, so you can find it again later.
Tracking mode
Automatic, Start/Stop (safe), or Start/Stop. See below.
Idle behavior
What happens when you go idle. See below.
Status - Mark completed
Marks the project as done. Reopening the .prproj (e.g. just to copy media out) won't accumulate time.
Walk-through of project settings.
Changing the path or unlinking the .prproj from the timer project.
Change…
Change the .prproj path.
Unlink
Detach the .prproj. The timer project and all of its tracked time stay put - it simply stops auto-resuming when that .prproj is opened in Premiere.
Link
Link a .prproj to the timer project.
If the .prproj you pick is already linked to another timer project, FLEDIT detects it (“This .prproj is already linked”) and asks whether to move the link here. That project is then unlinked but keeps all of its tracked time.
4Tracking modes
Automatic
Tracks your work across the whole Adobe suite. Leaving Adobe or going idle pauses the timer; coming back resumes it. Time spent outside Adobe isn't counted at all - not even as “Other”. The threshold for stopping the time count is your idle timeout from Global Settings.
Start/Stop - safe
Manual: you click Start, you click Stop. Time spent outside Adobe while running is logged under “Other”. The “safe” part: editors often forget to start the timer after a Premiere restart, so on relaunch this mode temporarily falls back to Automatic to avoid losing time. As soon as you click Start/Stop again it returns to manual.
Start/Stop
Once stopped, no time is recorded until you click Start - even after closing and reopening Premiere. While it's running, time spent outside Adobe is logged as “Other”, just like Start/Stop - safe.
Pure Start/Stop has no idle protection. If you forget to click Stop and walk away, the timer keeps running.
5Idle behavior
When idle is detected, you choose what to do with the time leading up to detection:
Stop at detection time
The timer stops the moment idle is detected. Example: idle timeout = 3 min. You stopped working in minute 12 - the timer stops in minute 15. Resuming work is counted from minute 15.
Subtract idle time
The timer rewinds to your last activity. Same example: you stopped working in minute 12, idle time = 3 min. The timer reaches minute 15 and rewinds to minute 12, so the “inactive” time isn't counted. But if you stopped moving the mouse in minute 12 and came back in minute 14, work simply continues - the idle time (3 min) was never reached.
Exporting? Use Render TimeA long export with no mouse or keyboard activity looks like idle time to the timer. Before you start the export, hold the Render Time pill for 1.5 seconds - details in point 6.
6Render Time - keep counting through an export
An export is the one case where Automatic mode can stop even though the time should still be counted. Neither Premiere Pro nor Media Encoder gives plugins a reliable “a render is running” signal, so FLEDIT can't detect it on its own.
Render Time is the answer: a small pill next to the timer that suspends idle detection for as long as the render needs.
Hold the Render Time pill for 1.5 seconds. A bar fills as you hold - let go early and nothing happens, so you can't arm it by accident.
Start your export. The pill turns lime and counts down the time it has left: Leave Render Mode · 1:58:12 left.
Hold it for 1.5 seconds again when the render is done to go back to normal idle detection.
What it actually does. While Render Time is armed, FLEDIT treats Premiere as active no matter how long you've been away from the keyboard, so the timer never pauses and nothing gets subtracted. If the timer had already paused on idle when you armed it - say you came back just to hit Export - it starts counting again immediately.
It always turns itself offRender Time ends on its own when the time limit runs out, when you hold the pill again, when the computer goes to sleep, or when Premiere restarts.
Set the limit to match your rendersThe cap lives in Global Settings → Render Time limit, default 120 minutes (you can set anything from 5 to 720). Pick a value a little above your usual export length. If the limit runs out mid-render the timer simply goes back to normal idle detection and pauses. Changing the limit affects the next time you arm Render Time; a countdown that's already running keeps the time it started with.
Only in Automatic modeThe pill appears only where idle detection actually exists - Automatic mode, or a Start/Stop (safe) project that has fallen back to auto after a restart. In a Start/Stop mode there is nothing to protect against: the timer runs until you stop it, so the button isn't shown.
Render Time - once held, the pill turns into Leave Render Mode with a countdown and the timer keeps running with no mouse or keyboard activity.
7Sleep, hibernate & midnight
If your computer goes to sleep or hibernates, FLEDIT closes the current interval automatically. When you wake it, time tracking resumes. Sessions logged before and after midnight are correctly split between the two dates in statistics.
8Adding time manually - “+ Add”
Click + Add in the project view. From the dialog you can:
Pick a date - Today, Yesterday, or any date from the picker
Enter the time as a From-To range or as a plain duration (hours + minutes)
Optionally write a note
Toggle billable and choose the billing - your hourly rate or a fixed amount
The entry is labelled “Manual” in the activity log so you can tell it apart from auto-tracked time.
Adding a manual time entry to a project.
9Editing & reviewing time entries
Every interval - auto-tracked or manual - can be edited later. Click the pencil icon next to any entry in Activity or Sessions and you can:
Add or change a free-form note (up to 500 characters)
Toggle billable / non-billable - the change instantly recalculates earnings and stats
Choose how that entry is billed - by your hourly rate or as a fixed amount
Editing one entry only affects that one entry. Manually added entries can be deleted, while entries tracked automatically by the timer are read-only and can't be deleted.
Editing one logged session - note, billable, and how it's billed.
Changing billable for a whole projectWhen you flip a project's billable setting in Project Settings, FLEDIT asks what to do with the sessions you've already recorded: leave them as they are (so the change only affects new time), or update every matching past session in one go. Sessions billed as a flat rate are left untouched, and their amount is kept as-is.
10Switching between projects
Open a different .prproj while another project is being tracked - FLEDIT does not switch automatically. A pending project banner appears asking if you want to switch. Click Switch here and tracking moves to the new project. This protects you from accidentally logging time against the wrong project when you briefly open something for reference.
Switching the timer from one project to another via the pending banner.
11Quick-create a new project or category
The + button in the projects list lets you create a new project or a new category - useful for tracking time on something that hasn't been opened in Premiere yet, or simply when your project contains many sequences.
Manually adding a new project and a new category from the projects list.
12Global Settings - defaults for every new project
Go to the All Projects view - the gear icon lives there. Click it → Global Settings. Anything you set here is used as the default for every new project FLEDIT creates.
Idle timeout
After how many minutes work time stops counting.
Render Time limit
How long Render Time may hold idle detection off, from 5 to 720 minutes (default 120). Set it a little above your usual export length.
Keep timer running while processing
Transcribe, Auto Censor, Cut Silence, Text Animate and Positioning can take a while, and you don't touch the mouse in the meantime. With this on (the default), Automatic tracking keeps the timer running while FLEDIT is working, for up to the Render Time limit. Turn it off if you prefer normal idle detection.
Tracking mode
Default mode for new projects: Automatic / Start-Stop safe / Start-Stop.
Idle behavior
Stop at detection time, or Subtract idle time.
Hourly rate & currency
Default rate plus one of 50+ currencies (USD, EUR, GBP, PLN, CHF, SEK, NOK, DKK, CZK, HUF, JPY, CNY, INR, AUD, CAD, BRL, ZAR, AED, …).
Billable by default
Whether new entries are marked billable.
Hide earnings (Streamer mode)
Blurs every monetary value in the panel - rate, earnings, totals - so you can stream or screen-share without showing your money.
Tags
Manage your tag library (max 30).
Clients
Manage your client list (max 50).
Categories
Custom categories for organising projects.
Setting an hourly rate and toggling Streamer mode (Hide earnings) to blur every monetary value in the panel.
13Archiving & restoring projects
Done with a project but want to keep its history? Archive it instead of deleting. Archived projects are hidden from the active list but every session, note and earning is preserved - and a single click restores them. To reach them, go to the All Projects view and click the gear icon → Archived.
Archive a project
Right-click a project in the list → Archive, OR enter bulk edit and pick Archive from the toolbar to archive several at once.
If the timer is currently tracking that project, it pauses immediately when you archive.
Archived projects no longer appear in the projects list - the Archived entry in the gear menu shows a count of how many are tucked away.
Open the Archived view
From the All Projects view, open the gear menu and click Archived to switch to the archive list. You'll see every archived project grouped by category, with last-active date and total tracked time. Use ← Back to return to the active projects.
Restore
Click the ↩ restore icon on any archived project to bring it back to the active projects list.
Tick several with checkboxes and use the bulk Restore button at the bottom of the Archived view.
Archiving a project, opening the Archived view, restoring it back to the active list.
Permanent deletion (Purge)
Purge is irreversible. From the Archived view you can also select projects and click Purge. This wipes the project file from disk - every time entry, note, and stat is gone for good. There is no undo. If you might ever want to come back to this data, just leave it in Archived.
Stats & archived projects
By default, archived projects are excluded from the Stats screen so totals reflect only active work. Flip the Archived filter at the top of the Stats screen to include them in earnings, billable hours, charts and exports.
14Multi-instance safety
If you open 2 instances of Premiere Pro, the timer in one of them shows a notice that time isn't being counted - that instance is in Passive mode. Time can only be counted in a single Premiere instance.
15Full statistics - the stats screen
Click the statistics icon in the projects view to open the full stats screen. Pick a date range across the top:
7d30d90dMonthCustom (date pickers)
Filter further by:
All ProjectsClientCategoryTagsBillable onlyArchived
Four tabs:
Overview
Total time, earnings (per currency), project & client count, daily-activity bar chart, app breakdown, insights (most productive day, longest session, active days, average session length).
Projects
Take a close look at each project on its own - broken down by day, time spent, and hourly rate.
Clients
See which projects you worked on and how much time you spent on them for each client.
Activity
This tab shows your efficiency - which day and which hour are the most productive.
A tour of the Stats screen - date range, filters and the four tabs.
16Exporting stats
The Export button in the stats screen opens an export dialog:
CSVPDFJSON
Pick a scope - Current view (with the filters above), Full month, or All time - and confirm.
Duplicates
The Duplicates tab finds every clip that repeats on your timeline. It could be the same song, an SFX, or a video clip.
1Scanning the timeline
Open the Duplicates tab and click Scan timeline. FLEDIT walks every video and audio track and lists anything that appears more than once.
Scanning the timeline, filtering the list and jumping to a duplicate.
2Filtering by category and search
Four category toggles - Video, Music, SFX, Offline - narrow the list. Classification is automatic:
Video
Any clip with a video track.
Music
Audio clip longer than 10 seconds.
SFX
Audio clip 10 seconds or shorter.
Offline
Clips whose source file is currently offline.
Offline always on topOffline files land at the top of the list with a red OFFLINE badge and a red border. One appearance on the timeline is enough to list the file, and the Gap setting doesn't apply to them - every placement is listed separately.
The search field narrows the visible list further by clip name.
3Jumping to a duplicate on the timeline
Expand a duplicate's menu and you'll see where that file appears, along with its track number (e.g. V2, A3, or V1+A1 for linked A/V). Click any timecode to move the playhead straight to that moment - no manual scrubbing needed.
4Gap setting
Gap decides when two pieces of the same file count as two separate uses instead of one.
The same song or clip is often cut into several pieces that sit right next to each other. That's one use, not a duplicate. Gap is the distance FLEDIT needs to see between two pieces before it treats them as two.
0 s
The most sensitive setting. Any gap at all, even a single frame, counts as a new use. Pieces cut back to back with no gap between them are still treated as one.
5 s
The default. Two pieces have to sit at least 5 seconds apart to count as a duplicate.
Higher values
Flag fewer things. At 30 s, the same music at 0:10 and again at 0:25 is still one use, because the pieces are only 15 seconds apart.
Merging works across all tracks, not just one. FLEDIT lines up every fragment of the same source file by time, wherever it sits (V1, V2, A1, A2…).
Notes
Notes - write timestamped notes, paste a whole wall of client feedback and let FLEDIT split it into markers, and sync notes with the timeline markers in Premiere. Never lose track of what still needs to be done.
1Automatic timestamps - works in many languages
FLEDIT reads time references inside a note and turns them into clickable markers (one click jumps to that spot on the timeline). Paste a whole wall of feedback - it's split into separate notes, and every detected time gets its own marker. No language setting is needed: all the languages below are recognized automatically.
The plugin is English only - your notes are not. The FLEDIT interface itself is in English, but timestamp detection in Notes understands many languages. So you and your clients can write feedback in your own language and still get automatic markers. The full list is in the table below.
1. Timecodes (every language). Colon notation is language-independent:
Format
Example
Means
M:SS
2:12
2 min 12 s
MM:SS
46:00
46 min
H:MM:SS
1:23:45
1 h 23 min 45 s
with fraction
1:23.5
1 min 23.5 s (frame-accurate)
2. Word units. Number + unit, e.g. 5 min, 2 h, 30 s, 2 hours. The space is optional (5min works too). The word list per language is below.
3. Ranges (from-to). Two times become a single range:
By dash or symbol: 1:00 - 2:00, 1:00 ~ 2:00
By words: from 1:00 to 2:00, od 1:00 do 2:00, de 1:00 a 2:00
With units: from 30 s to 2 min
Supported languages. The words FLEDIT understands for “from … to”, hours, minutes and seconds:
Language
“from … to”
Hour
Minute
Second
Polski
od … do
godzina, godziny, godzin, godz
minuta, minuty, minut, min
sekunda, sekundy, sekund, sek
English
from … to
hour, hours, hr, hrs, h
minute, minutes, min, mins, m
second, seconds, sec, secs, s
Español
de … a, del … al
hora, horas, h
minuto, minutos, min, m
segundo, segundos, seg, s
Português
de … a / até
hora, horas, h
minuto, minutos, min, m
segundo, segundos, seg, s
Français
de … à
heure, heures, h
minute, minutes, min, m
seconde, secondes, sec, s
Deutsch
von … bis
Stunde, Stunden, Std, h
Minute, Minuten, min, m
Sekunde, Sekunden, Sek, s
Italiano
da … a
ora, ore, h
minuto, minuti, min, m
secondo, secondi, sec, s
Nederlands
van … tot
uur
minuut, minuten, min, m
seconde, seconden, sec, s
Čeština
od … do
hodina, hodiny, hodin, hod, h
minuta, minuty, minut, min
sekunda, sekundy, sekund, sek, s
Slovenčina
od … do
hodina, hodiny, hodín, hod, h
minúta, minúty, minút, min
sekunda, sekundy, sekúnd, sek, s
Svenska
från … till
timme, timmar, tim, h
minut, minuter, min
sekund, sekunder, sek, s
Dansk
fra … til
timer
minut, minutter, min
sekund, sekunder, sek, s
Norsk
fra … til
timer
minutt, minutter, min
sekund, sekunder, sek, s
Suomi
-
tunti, tuntia, h
minuutti, minuuttia, min
sekunti, sekuntia, s
Magyar
-
óra, órák
perc
másodperc
Română
de la … până la
oră, ore, h
minut, minute, min, m
secundă, secunde, sec, s
Türkçe
-
saat, sa
dakika, dk, dak
saniye, sn, san
Bahasa Indonesia
dari … sampai / hingga
(timecode only)
menit, min
detik, dtk
Tiếng Việt
từ … đến
giờ
phút, ph
giây, s
Filipino
-
oras
minuto, min
segundo, seg, s
Hrvatski
od … do
sat, sata, sati, h
minuta, minute, min
sekunda, sekunde, sekundi, sek, s
Русский
с / от … до
час, часа, часов, часы, ч
минута, минуты, минут, мин
секунда, секунды, секунд, сек, с
Українська
від / з … до
година, години, годин
хвилина, хвилини, хвилин, хв
секунда, секунди, секунд, сек, с
Български
от … до
час, часа, часове, ч
минута, минути, минут, мин
секунда, секунди, секунд, сек
中文
… 到 … / 〜
小时, 小時, 时
分钟, 分鐘, 分
秒
日本語
〜 / … 到 …
時間, 時
分
秒
한국어
-
시간
분
초
Indonesian Write hours as a timecode (e.g. 1:00:00); minutes and seconds in words work normally.
What FLEDIT does NOT detect
Spelled-out numbers (“half a minute”, “eine Minute”) - a digit is required (0.5 min, 30 s).
Ratios (16:9), dates (12.06.2026) and phone numbers - skipped on purpose.
Tips
Time at the start of a line: the rest becomes the marker's comment (2:12 fix the color = a marker at 2:12 with the note “fix the color”).
Time in the middle of a sentence: the whole line is kept as text, and the marker is still created.
Every detected time is its own clickable marker; pasting many lines at once auto-creates separate notes.
Limits
Up to 500 notebooks in total.
No fixed limit on how many notes a single notebook can hold.
Up to 500 markers per notebook. Beyond that, FLEDIT auto-disables marker syncing for that notebook - your notes stay, they just stop placing markers on the timeline until the count drops back under the limit.
Up to 50 categories.
2Creating notebooks
Each notebook is an independent set of notes. Click + Add → Create Note in the sidebar to make a new notebook and start typing. Activate any notebook by clicking it - only the active notebook syncs with timeline markers.
Creating a new notebook.
3Categories - organising notebooks
Group related notebooks under categories (e.g. “Client A”, “YouTube”, “Color”). Click + Add → Create Category, then either right-click a notebook → Category → pick one, or simply drag the notebook onto the category header. To drag notebooks, the sort must be set to “Custom Order”.
Assigning a notebook to a category.
Renaming a category.
4Editing notebooks - rename, move, delete
Right-click any notebook for the full menu: Rename, Move up, Move down, change category, or delete. You can also drag notebooks freely to reorder them within or across categories.
The ⋮ menu in the header of the open notebook starts with Open sequence, with the notebook's sequence name next to it. Click it and FLEDIT opens that sequence on the timeline. If the sequence isn't in the project, FLEDIT asks whether to open a copy of it that carries this notebook's markers or a sequence with the same name, and after you click Open it links the notebook to it. If the sequence lives in another project, it tells you which one.
Renaming a notebook.
5Bulk edit - delete or move many notebooks at once
Click the three vertical dots next to Notes and choose Edit. Each notebook gets a checkbox; tick the ones you want, then use Delete or Move to to act on the whole selection in one go. Click Done to leave bulk edit mode.
Reordering notebooks by dragTo drag notebooks into your own order, first open the three-dot menu next to Notes and set the sort to “Custom Order”. With that on you can grab any notebook and drop it wherever you like - in the Alphabetical or Modified sort modes the list stays fixed and dragging is disabled.
Selecting and deleting multiple notebooks at once.
6Writing notes
Open a notebook, type a note in the input field at the bottom, hit Enter or the + button. Plain text notes work too - not every entry needs a timestamp.
Adding a basic note.
7Timestamp formats - what FLEDIT understands
Whenever FLEDIT spots a timestamp inside a note, it automatically creates a marker on the timeline at that position. The full list of formats - timecodes, word units and ranges, in every supported language - is in Automatic timestamps.
Adding a note with a single timestamp - a marker appears on the timeline.
Adding a note with a range timestamp (“from / to”) - a range marker appears on the timeline.
8Pasting feedback - automatic detection
Notes shines when you receive a long list of corrections from a client. Copy the whole block and paste it directly into the new-note input - FLEDIT analyses every line and finds timestamps, splits the paste into separate notes, and creates markers on the timeline automatically.
Premiere markers and ripplePremiere markers do not shift with the timeline unless you use ripple-aware edits. If you start cutting from the beginning, marker timecodes drift out of sync. Work from the end of the timeline when revising, or adjust markers after changes. Make sure your timestamps follow the formats above so FLEDIT parses them correctly.
Pasting a wall of revisions - FLEDIT splits it into separate notes and creates one marker per item.
9Auto-pickup of markers from Premiere
If a notebook is open and you add a marker in Premiere - either by pressing M on the timeline, or by typing a comment into a marker - FLEDIT pulls the marker's text and timecode straight into the active notebook as a new note.
Whether this pickup keeps running when you're not looking at the Notes tab is controlled by a toggle in the three-dot menu next to Notes - Capture in background:
When on
Markers you add on the timeline (via Premiere's shortcuts) are imported into the active notebook even when the Notes tab is hidden or another FLEDIT tab is active.
When off
Markers are only captured while the Notes tab is open.
No active notebook
With no notebook active, the markers stay as plain Premiere timeline markers and nothing is imported into Notes.
macOSOn macOS markers are always captured while Notes is the active FLEDIT tab - regardless of this switch.
Adding a marker in Premiere with text - it appears as a note in FLEDIT.
10TC button - insert current playhead position
Click the TC button next to the new-note input to insert the playhead's current timecode. Type your description after it and hit Enter - instant timestamped note plus marker.
Clicking TC, typing a description, adding the note.
11Importing existing markers as notes
Already have markers on your timeline? Click the three dots in the notebook header and choose Import markers from timeline. FLEDIT reads every marker on the timeline and turns each one into a note - complete with its name and comments.
If a notebook is already active, FLEDIT asks where to put them:
Into the active notebook
The markers are merged into the notebook you're in. FLEDIT checks what's already there and only adds the ones that are missing - existing notes aren't duplicated. When everything is already present you'll just see “All markers already imported”; otherwise FLEDIT reports how many were added, merged and skipped.
Into a new notebook
FLEDIT creates a fresh notebook called “Imported Markers” containing every marker.
If no notebook is active, FLEDIT simply offers to create that new “Imported Markers” notebook.
Import always takes the markers over together with their colours, including markers that belonged to another notebook. From now on you control them from here, and the notes in that other notebook stay. Two markers in the same second with different text become two separate notes. Ctrl+Z right after the import undoes it without deleting markers from the timeline, and Ctrl+Shift+Z redoes it.
Importing all timeline markers into a new notebook.
12Showing & hiding markers
Two levels of control:
Master toggle - the switch in the notebook header turns every marker for the active notebook on or off at once.
Per-timestamp switch - every timestamp chip inside a note has its own small switch that shows or hides just that one marker.
Switching to another notebook hides the previous notebook's markers. They come back when you return to it.
Toggling individual markers and using the master switch to hide them all.
The “old timeline markers are not linked to notes” barWhen you close the project while the timeline still carries markers from a notebook whose master switch at the top you never turned off, FLEDIT shows a notice the next time it starts: “<notebook name>: old timeline markers are not linked to notes.” - or “2 notebooks: …” when several are involved. It is not an error, it is a reminder: those markers are still on the timeline. The notebook is not watching them, so moving or deleting one will not travel back to the note.
What you can do: click Open notebook (or Open Notes when there are several candidates) and FLEDIT switches to the Notes tab and opens that notebook - from there you either switch the markers back on or clear them from the timeline by hand. You can also close the bar with the ×: it stays gone for that set of markers. You can also take these markers over, colours included, with Import markers from timeline.
13Marker colours
Premiere gives markers eight colours, and FLEDIT lets you use all of them. The rule is simple: your markers keep their colours. A new marker stays in whatever colour Premiere gave it, and FLEDIT changes a marker's colour in two cases only - when you pick a colour on a timestamp chip, or when you tick a note as done.
The eight colours are Premiere's own, so a marker looks the same in FLEDIT as it does on your timeline:
GreenRedPurpleOrangeYellowWhiteBlueCyan
1. Done colour. Open the notebook's three-dot menu and pick Default done color - the colour a marker switches to the moment you tick its note as done. Red out of the box; the dot next to the menu entry shows the current pick, and each notebook keeps its own done colour.
2. A colour for one timestamp. Right-click any timestamp chip inside a note and pick a colour just for that marker. The chip itself takes on the colour, so you can see at a glance which notes are flagged how. The same menu has Reset to default, which returns the marker to Premiere's standard colour - it appears only once that timestamp actually has a custom colour.
Recolouring in Premiere syncs backChange a marker's colour on the timeline and FLEDIT notices, storing it as that timestamp's colour.
Colours are saved in the TXT export, so the file keeps a record of them.
14Markers & multiple sequences
Markers belong to the sequence they were created on. When you switch to a different sequence, FLEDIT hides the markers for that sequence by default - flip the master toggle on to reactivate them. The on/off state is remembered per sequence per notebook.
15When markers change while Notes isn't watching
While a notebook is open with the master toggle on (or Capture in background is enabled), Notes mirrors the timeline live: delete a marker in Premiere - by hand or with Ctrl+Z - and the note that was captured from it disappears too. Notes you typed yourself are never removed this way; they only lose the link and their timestamp switch turns off. Redo brings the marker back, and its note comes back with it. Editing a marker in Premiere doesn't unlink it from its note.
Everything that happens outside that live window - the Notes tab closed, the master toggle off, Premiere restarted, a project reopened from an auto-save - is treated more carefully the next time the notebook connects:
Moved, renamed or recoloured markers - the changes are merged into your notes automatically: timestamps update, texts merge, colours are picked up. Nothing to do on your side.
Missing markers - FLEDIT never deletes notes on its own. Instead it shows a “Markers removed” dialog and lets you decide:
Remove notes
Deletes the notes that were captured from the now-missing markers. Notes you wrote yourself are always kept.
Keep and mark done
Keeps every note, ticks the affected ones as done and switches their marker links off.
Restore markers
Keeps every note and puts the missing markers back on the timeline.
Pressing Esc (or clicking outside the dialog) is always safe: all notes stay, only their dead marker links switch off.
16Sorting - by time vs. manual
Two sort modes via the three-dot menu:
Sort by time - notes with a timestamp are ordered chronologically; notes without a timestamp stay where they are (FLEDIT doesn't move them to the end). You can't reorder notes manually in this mode.
Sort manually - complete freedom. Grab the three horizontal lines at the bottom-left of any note to drag it into any position.
Switching between “Sort by time” and “Sort manually” - and dragging notes around in manual mode.
17Marking notes as done
Tick the checkbox on a note to mark it complete. The note becomes inactive (read-only, dimmed) and its marker on the timeline switches to the notebook's done colour (Red out of the box - see Marker colours). Untick to bring it back.
Marking a note as done - the marker switches to the done colour (Red by default).
18Deleting notes
Click the trash icon on the right side of any note. The note is removed and its marker disappears from the timeline at the same time. (Native Premiere markers you created yourself are never touched.)
Deleting a note - the marker disappears from the timeline.
19Exporting notes as TXT
Three-dot menu → Export as TXT. You'll get a plain text file with every note in the active notebook, prefixed with checkboxes ([x] for done, [ ] for pending). Perfect for sending a status report.
Exporting a notebook to a .txt file.
20FLEDIT markers vs. your own markers
FLEDIT only ever manages the markers that belong to a notebook. Any marker you placed by hand that isn't tied to a notebook is treated as part of the timeline, not part of Notes.
Troubleshooting
“FLEDIT Helper is missing” / stuck on “Checking license...”
1What you see
FLEDIT doesn't load. The panel shows either “FLEDIT Helper is missing” or a spinner that never leaves “Checking license...”. Your keyboard shortcuts stop working too.
This is what the panel looks like once the helper file has been quarantined.
2Why it happens
FLEDIT ships a small component called FLEDITHelper.exe (on macOS: FLEDITHelper). It verifies your license and powers the global keyboard shortcuts. Some antivirus programs - most often Microsoft Defender - flag it automatically and move it to quarantine.
This is a false positiveThe file is part of FLEDIT and is not malware. Once it's quarantined, FLEDIT has no way to check your license - hence the endless spinner.
3Fix on Windows (Microsoft Defender)
Open Windows Security → Virus & threat protection.
Go to Protection history and find the recent entry naming FLEDITHelper.exe.
Open it and choose Actions → Restore (or Allow on device).
To stop it happening again, go back to Virus & threat protection → Manage settings → Exclusions → Add an exclusion → Folder, and select: C:\Program Files\Common Files\Adobe\CEP\extensions\FLEDIT
Return to Premiere Pro. FLEDIT picks up on its own within about 30 seconds - no restart needed. If the warning is still there, restart Premiere Pro.
4Fix with other antivirus software
Open your antivirus quarantine or “threat history”, restore the file named FLEDITHelper.exe, and add the FLEDIT bin folder to the exclusion / allow list. The steps are named differently per vendor (Avast, Bitdefender, ESET, Kaspersky, Malwarebytes, Norton), but the sequence is always the same: restore, then exclude.
5If the file can't be restored
Reinstall FLEDIT with the original installer. Add the exclusion before launching Premiere Pro so the helper isn't quarantined again.
Your license is safeReinstalling does not use up an activation - your license stays activated.
6macOS
On macOS the equivalent problem is Gatekeeper blocking the helper after a download. FLEDIT clears this automatically on start. If the panel still can't verify the license, work through these steps:
Open System Settings → Privacy & Security and scroll to the bottom of the page.
Find the note about FLEDITHelper being blocked and click Open Anyway. Enter your administrator password when macOS asks for it.
If antivirus software quarantined the helper instead, add the FLEDIT bin folder to its exclusion list: ~/Library/Application Support/Adobe/CEP/extensions/FLEDIT/bin
If the file is gone for good, reinstall FLEDIT with Premiere Pro closed, then open Premiere again. Reinstalling does not use up an activation.
Missing Components
The Missing Components dialog - which components are missing, and the installer download button.
The four components
FLEDIT relies on four native components - FLEDITHelper, FE_ExtendScriptLib, FE_ControlSurface and FlEditImporter. All four are required: if even one of them is missing, FLEDIT won't work properly.
If the file isn't there at all (any component)
Reinstall FLEDIT - running the installer copies all four components into the right places. Make sure Premiere Pro is fully closed before you run it.
FE_ControlSurface missing
The first time you open FLEDIT after installation, the plugin auto-registers the Control Surface with Premiere and shows an amber banner at the top of the panel:
BannerFLEDIT Control Surface registered. Restart Premiere Pro to activate. Click to dismiss.
Restart Premiere Pro - after you first launch FLEDIT following installation, you may need to restart Premiere Pro so the Control Surface is added automatically.
The banner after the first launch - restart Premiere Pro so the Control Surface activates.
macOS Permissions
macOS doesn't let apps capture keystrokes - for keyboard shortcuts (e.g. from the SearchBar popup) to work, you need to grant Accessibility permission to Adobe Premiere Pro itself - the app that runs the FLEDIT panel.
Add every Premiere version you usemacOS grants Accessibility separately for each Premiere version - Adobe Premiere Pro, Adobe Premiere Pro (Beta), and so on. A version that isn't on the list - or is turned off - will cause FLEDIT to malfunction.
Granting access
Open System Settings → Privacy & Security → Accessibility
Find Adobe Premiere Pro in the list and turn its toggle ON. If it isn't there, click + and add it from your Applications folder.
Do the same for every Premiere you edit in - e.g. Adobe Premiere Pro (Beta) or a different release year - so each one has its own toggle ON.
Back in FLEDIT, click Check Again in the warning hint, or restart Premiere Pro
Common Issues & Solutions
FLEDIT doesn't appear in Window → Extensions
Restart Premiere Pro completely
Confirm you're on Premiere Pro 2025 (v25.0) or later
Still not working? Reinstall FLEDIT with all Adobe apps closed, then reopen Premiere
“License activation failed”
Check internet connection
Copy-paste the key from your Gumroad email (avoid typos)
If you see license_invalid, the key is not valid - make sure you pasted it in full (no extra spaces) and that it matches this product.
Exceeded your machine limit? FLEDIT shows a window of all devices using your key - remove one you no longer use to free a slot
Stuck on “Checking license...” and never getting to the key screen? That's usually your antivirus quarantining the FLEDIT helper - see Helper Blocked by Antivirus.
SearchBar popup doesn't open
Check for hotkey conflicts with other apps (Discord, OBS, screen-capture tools)
On macOS the SearchBar popup defaults to Opt + Space; if you rebind it, avoid combinations the OS already owns (e.g. Spotlight's Cmd + Space)
“X shortcuts failed to register” = another app is blocking those keys at OS level
If the FLEDIT Monitor switched off, your hotkey conflicts with Premiere - pick a different one and the Monitor turns back on
SearchBar shortcut conflicts with Premiere
FLEDIT reads your Premiere keyboard profile (.kys) and blocks conflicting shortcuts. Two options: change the binding in Premiere's Edit → Keyboard Shortcuts, or pick a different key in FLEDIT. A key you set inside FLEDIT applies right away - but if you change shortcuts or switch keyboard profiles on the Premiere side, restart Premiere Pro so the .kys updates and FLEDIT picks up the change.
Timer: wrong time / doesn't start
Check the Tracking mode in project settings
Automatic mode: ensure Premiere has focus - idle pauses tracking after the idle time. Rendering isn't detected as activity, so before a long export hold the Render Time pill for 1.5 seconds. The timer then keeps counting for the whole export.
“Passive mode” = another Premiere instance controls the Timer.
Project marked completed? Mark it active again to resume tracking
Pasted screenshots end up in the wrong folder
Check the Save Location setting in the Paste Image tab
“Use Project Folder” only works after the project is saved at least once
Check the Import to bin dropdown for the destination bin in the Project panel.
Transitions don't scale correctly
FLEDIT reads sequence resolution for auto-scaling. Non-standard sequences may need a manual adjustment in Effect Controls.
Focus flickers between the timeline and FLEDIT while you drag media
When you drag a file that has both video and audio, focus briefly jumps between the timeline and the FLEDIT panel. This is deliberate - FLEDIT activates the timeline for a moment so Premiere accepts the clip with video and audio (not audio only), then hands focus back.
“The importer reported a generic error”
Corrupted media cache. Edit → Preferences → Media Cache → Delete, restart Premiere.
Macro stops halfway through
Macros wait for each step to finish before the next runs - check that each step actually has something to run correctly on (a selected clip, an open sequence, available media)
A few commands can't be used as macro steps - FLEDIT hides those automatically, so anything you can see in the step list will run. Nest Clips, Nest Individual Clips and Unnest Sequence all work inside a macro.
Steps that fail (e.g. no clip selected) are skipped and the macro continues
The timeline can be very “heavy”, so a macro may need more time to finish
Known Limitations
Performance on very large projects
The limit here is the platform. CEP - the extension system Premiere gives me - caps how fast any extension can run. I've optimised FLEDIT heavily and I'll keep doing so, but on very large projects you will notice it: an animation can take longer to import, and some SearchBar actions run slower than they would on a regular timeline.
Premiere is busy statusWhen Premiere stops responding for a moment (saving, rendering, a heavy import, an open dialog), FLEDIT waits and lets you know. You choose how in Settings → Busy Indicator:
Banner (default) - a red “Premiere is busy” bar; you can drag it, and a double-click puts it back. Glow - a dark red glow along the bottom of the panel that doesn't block clicks. Off - no signal.
Clicking an option shows a preview. It's not an error, the indicator goes away on its own.
Export / render time isn't detected automatically
Neither Premiere Pro nor Media Encoder exposes a reliable signal that a render or export is in progress, so the Timer can't detect one by itself. During a long export with no keyboard or mouse input, Automatic mode would treat you as idle and stop counting.
The workaround is built in: hold the Render Time pill next to the timer for 1.5 seconds before you export, and idle detection is suspended until the render finishes or the limit runs out. You can also switch the project to a Start/Stop tracking mode, which keeps running until you stop it by hand.
Undo & History States
FLEDIT runs its own dedicated undo system (Undo/Redo). For it to work as well as possible, set more history steps in Premiere. Open Premiere's History panel, click the three-line menu next to the History tab → Settings, and set History States to 100.
SearchBar on macOS
If you assign e.g. Command + Space to the SearchBar popup, Spotlight stops being triggered inside Premiere. If you run into this, just change the bind that uses a keyboard shortcut already used by the system / another app.
User MOGRT previews
Preview thumbnails and videos come from inside the .mogrt file. You can't provide custom previews. No embedded preview = a placeholder is shown.
Drag previews are single-track
While you drag a transition or effect from the Animations tab, the preview that follows the cursor carries one video and one audio track. Transitions built from several layers therefore look single-track while dragging - on drop, FLEDIT inserts the full version.
Premiere markers and ripple
Premiere markers don't shift when you cut the timeline unless you use ripple-aware edits. If you receive a lot of feedback, work from the end of the timeline so earlier timestamps stay in the right place. After many changes, adjust markers if needed.
Presets - Premiere limitations
Premiere's .prfpset preset system has a few known limitations:
Parameters set through a graphical control often don't carry over - e.g. the RGB wheels or curves in Lumetri Color, and anything else you adjust visually rather than by typing a value. Fortunately, there aren't many such effects.
Presets made from transitions applied onto clips (e.g. Pop Motion).
Keyframe interpolation such as velocity (ease in / out) doesn't transfer 1:1 - the plugin tries to reproduce the motion as closely as it can, but this is a limitation on Premiere's side.
I'm hopeful this can be solved in the future.
More
FAQ
No. Standard and Pro are a one-time purchase.
FLEDIT works with Adobe Premiere Pro 2025 (v25.0) and newer, on Windows or macOS. It may run on older releases, but 2025 and up is what I test and support.
FLEDIT runs on both Windows and macOS - any version that can run Adobe Premiere Pro 2025 (v25.0) or later. There is no separate OS version requirement: if your system runs Premiere Pro 2025+, FLEDIT runs too. Step-by-step install: Installation.
The FLEDIT interface is English only. The one exception is notes: timestamp detection in the Notes tab understands 27 languages, so you and your clients can write feedback in your own language and still get automatic markers. The Timer also tracks your earnings in 50+ currencies (USD, EUR, GBP, PLN and more). The full list of supported languages is in the Notes - automatic timestamps section.
Yes. You can use FLEDIT commercially on every tier, including Free: in your own videos, in client projects, and in paid edits. Standard and Pro differ in what they can do, not in whether you are allowed to earn with them.
Yes, and you do not have to deactivate anything by hand. Just activate on the new machine - if that puts you over your device limit, FLEDIT shows every device using your key (with activation and last-used dates) so you can log the old one out yourself and free a slot. This works even if the old machine was formatted or is gone. Standard = 1 active machine, Pro = 2.
Only for your license. After activation, FLEDIT re-checks it online from time to time, so it needs a connection now and then. You can keep working offline between checks - but if it cannot reach the server for a while, it will ask you to reconnect to the internet before you can continue.
Your notes, settings, Timer projects, statistics and earnings are stored locally on your computer. FLEDIT connects to the internet only to verify your license and to fetch notifications (e.g. about a new plugin version).
Yes. Transcription runs entirely on your computer, without an internet connection - the recording is never uploaded. How long it takes depends on your computer, mainly the graphics card and the processor. For example, Auto Censor, which uses the same engine, analysed 7 h 40 min of footage in about 30 minutes on a computer with an Intel Core i9-14900K and an NVIDIA GeForce RTX 5080; transcription should take a similar time. On less powerful hardware it will take longer.
There is no upgrade and no paying the difference. You buy the higher tier as a new purchase and enter that new key in the Settings tab. Everything you have already set up stays where it is: keyboard shortcuts, macros, Timer projects and notes.
Because I would rather say it outright than pretend a plugin this large is flawless on day one. FLEDIT does a lot of unusual things under the hood. Before release it was tested for over six months by several dozen professional editors, and their reports are how most of the bugs got fixed - but I assume a few more will surface. In practice it means this: FLEDIT works and you can use it for real work, commercial projects included, but you may hit a bug or a feature that behaves differently on your setup. If you run into something, write to me by e-mail or on Discord - fixes ship regularly and the plugin tells you when a new version is out.
Refunds are handled by Gumroad under its own terms. You can request a refund within 14 days of purchase.